Yes! If your form has multiple pages and you want people to be able to review their answers before submitting, you can use the Rule Builder to effectively create a summary page at the end of your form.
With this feature, you can:
- Prevent incomplete or incorrect submissions
- Gather the most accurate data possible for research surveys and feedback forms
- Confirm items and payment details for order forms
- Let students review their answers on quizzes and evaluation forms
- Verify submission information for registration and application forms
- And more!
How to Review Before Submit with Easy Forms
For this use case, we just need to follow two steps:
1. Create a Multi-Step Form with the Form Builder
2. Let users preview their form submissions with the Rule Builder
It’s very easy and fully customizable.
1. Create a Multi-Step Form with the Form Builder
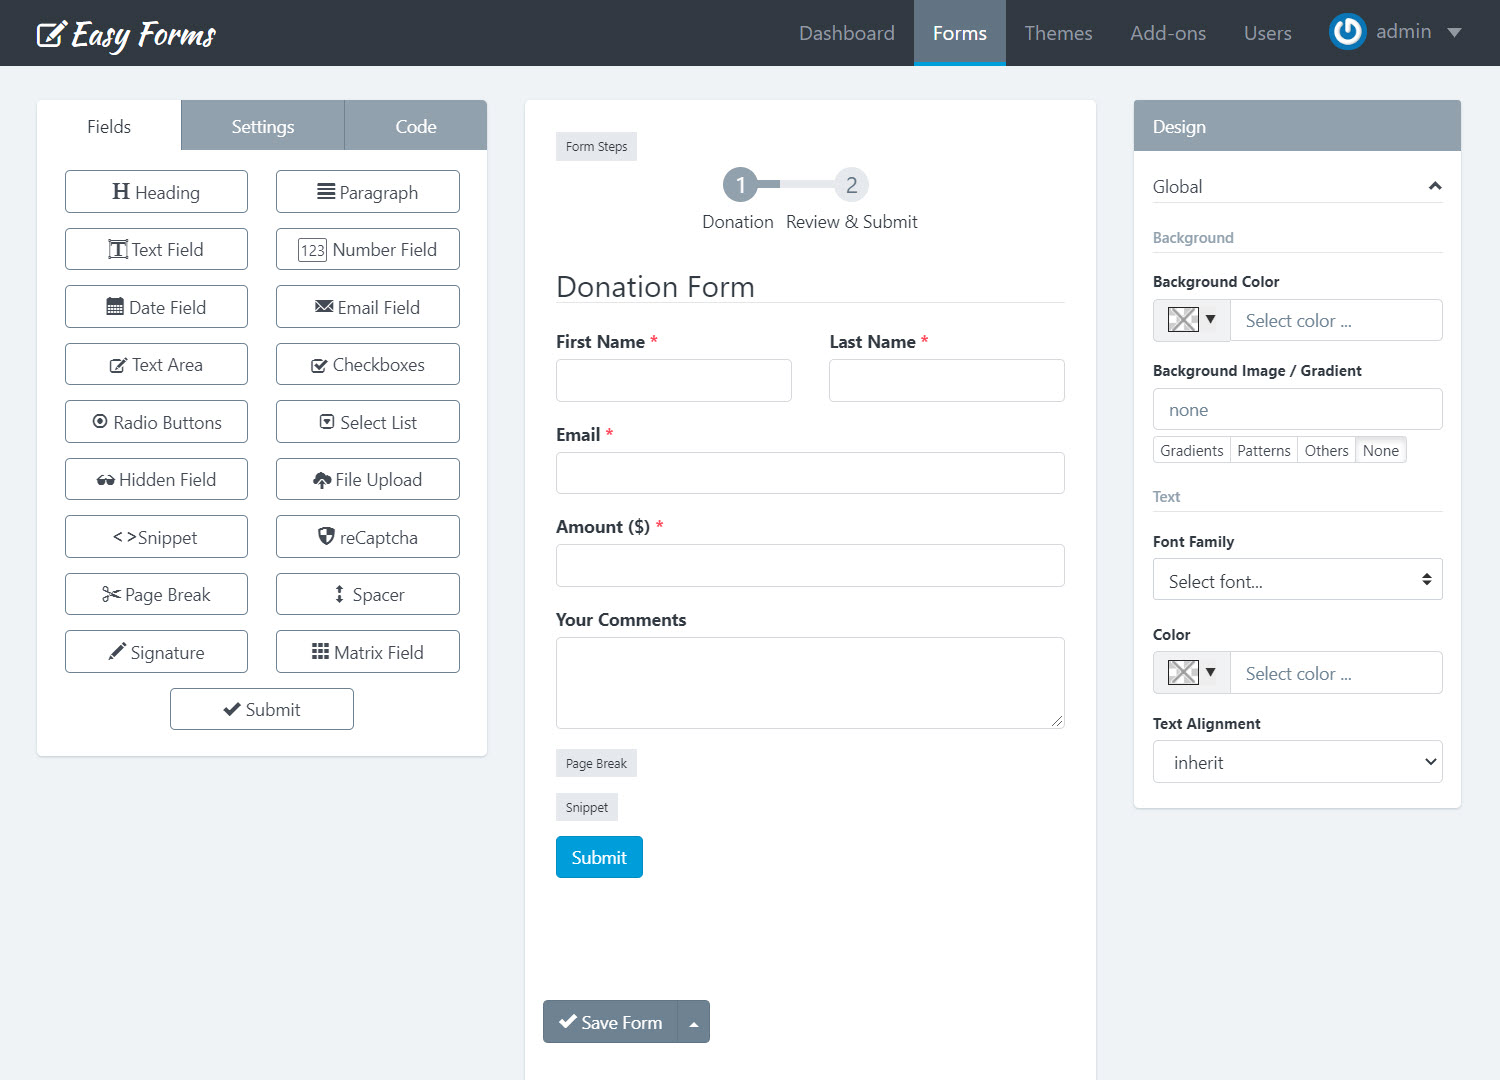
For this example, we are going to create a Donation form.
- Go to Forms > Create Form
- Change the title to “Donation Form”
- Remove the paragraph
- Add a Text Field. Change the Label to “First Name” and check “Required”
- Add a Text Field. Change the Label to “Last Name” and check “Required”
- Add an Email Field. Change the Label to “Email” and check “Required”
- Add a Number Field. Change the Label to “Amount ($)” and check “Required”
- Add a Text Area. Change the Label to “Your Comments”
- Add a Page Break and change the Form Steps to “Donation” and “Review & Submit”
- Add a Snippet with the following HTML code:
<div id="review"> </div> - Add a Submit Button
- Click Save Form
The key part is the HTML snippet, that DIV with ID: review will be the container of the dynamic content that will be generated by Rule Builder.
Your Form Builder should looks like this screenshot.
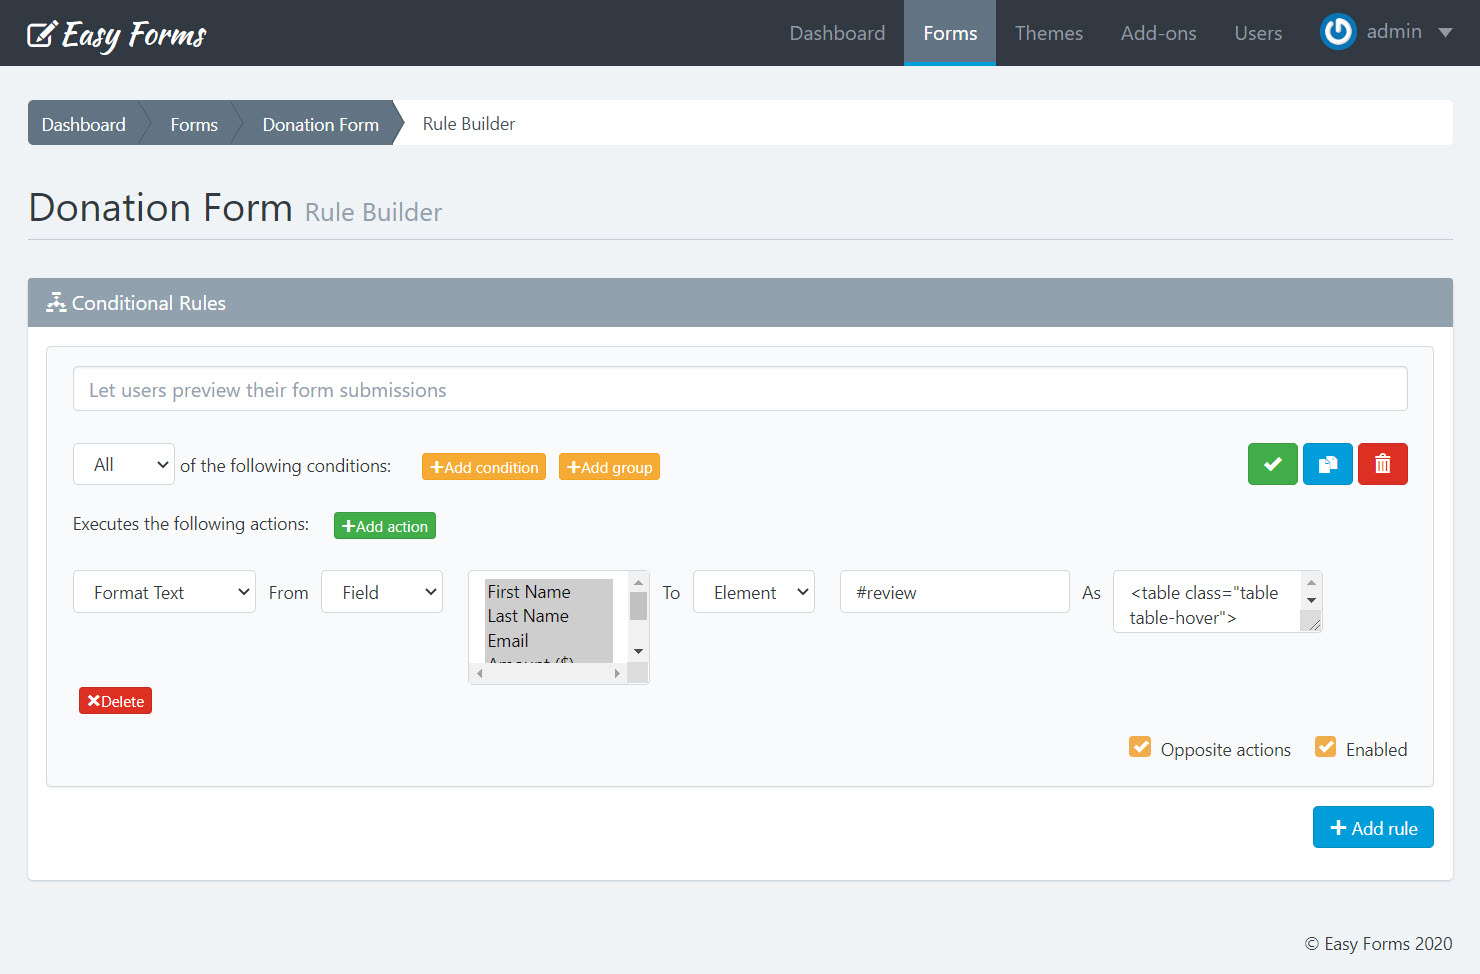
2. Let users preview their form submissions with the Rule Builder
Now we are going to use the tool to manipulate text within the Form. This tool will merge fields and HTML code, replacing placeholders.
Steps:
- Go to Forms > Actions > Conditional Rules
- Click Add Rule
- In Name / Description enter: Let users preview their form submissions
- Click “Add action“
- Select “Format Text“
- From: “Field” and select all the fields.
- To: “Element” and enter the DIV id as a jquery selector: #review
- As: Enter the following HTML code that will be displayed as preview
<table class="table table-hover">
  <thead>
    <tr>
      <th colspan="2">Please review your responses to ensure that all of the information is correct:</th>
    </tr>
  </thead>
  <tbody>
    <tr>
      <th>Name</th>
      <td>{{text_1}}</td>
    </tr>
    <tr>
      <th>Last Name</th>
      <td>{{text_2}}</td>
    </tr>
    <tr>
      <th>Email</th>
      <td>{{email_1}}</td>
    </tr>
    <tr>
      <th>Amount ($)</th>
      <td>{{number_1}}</td>
    </tr>
    <tr>
      <th>Your comments</th>
      <td>{{textarea_1}}</td>
    </tr>
  </tbody>
</table>
This is just a table, but pay attention to the placeholders, for example {{text_1}} refers to the id of the “First Name” field. Each placeholder will be replaced by its field value.
9. Click the Green Button to save the rule.
The Rule Builder should looks like this screenshot.
And that’s all!
Additional Step: Custom Confirmation Message with Merge Fields
To give it a personal touch, we are going to add a custom confirmation message to display the Donor’s name. For this, go to Form Settings > Confirmation Settings > Click “Only Message” > And enter the following message:
<h4>Dear {{ text_1 }} {{ text_2 }}, <strong>your support is invaluable to us!</strong></h4>
<p><small>If you have specific questions about our mission be sure to visit our website or reach out to [email protected]!</small></p>
<p><small>Sincerely,<br>Jane</small></p>
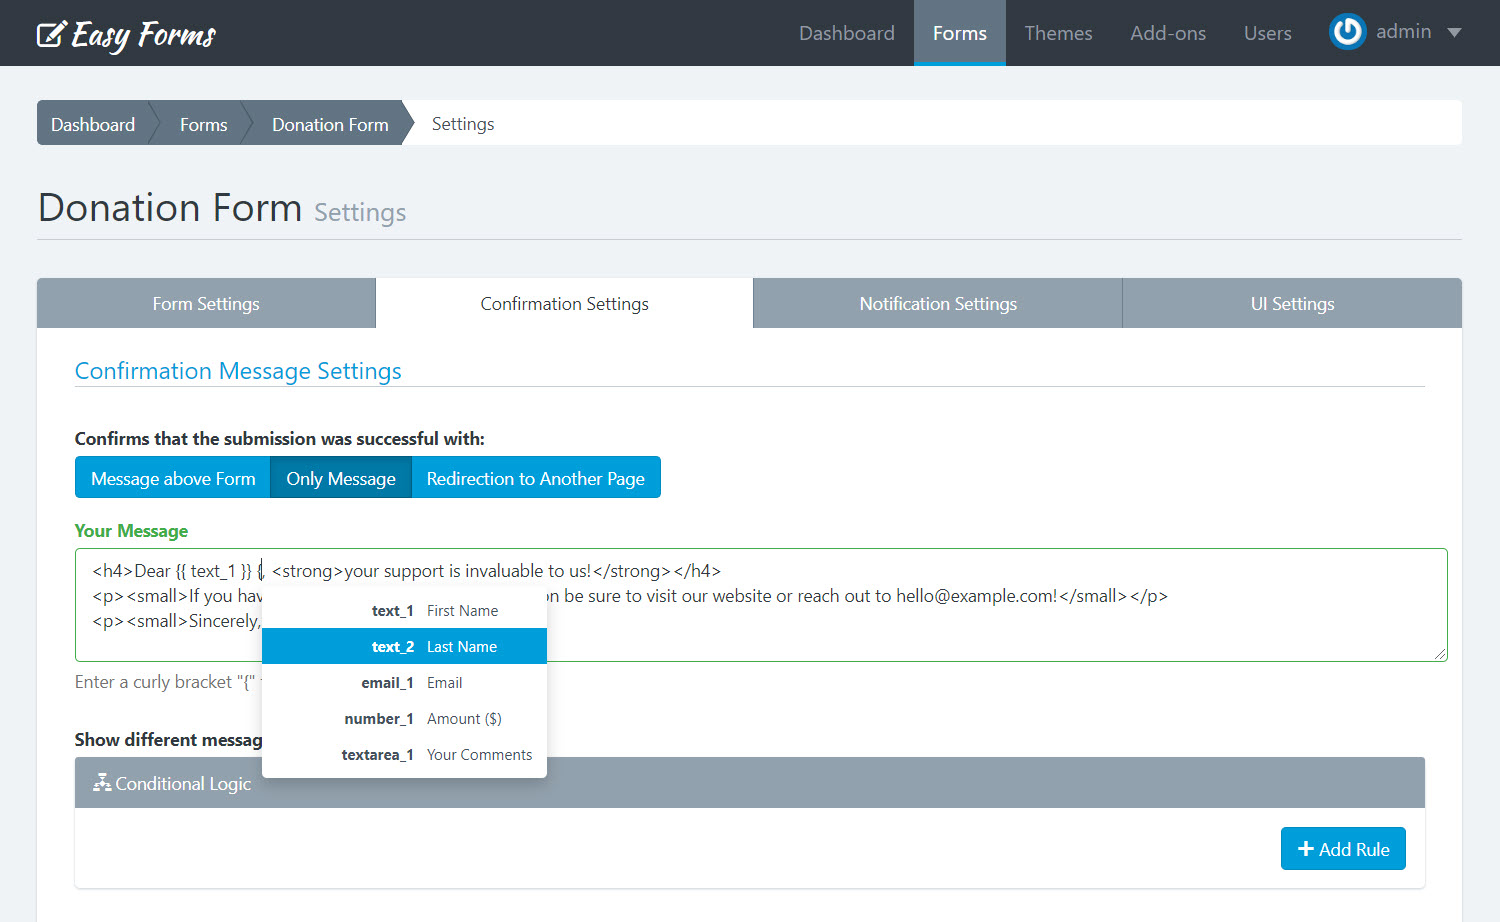
Note: You can use the Theme designer or CSS code to give it a better look and feel to the confirmation message.
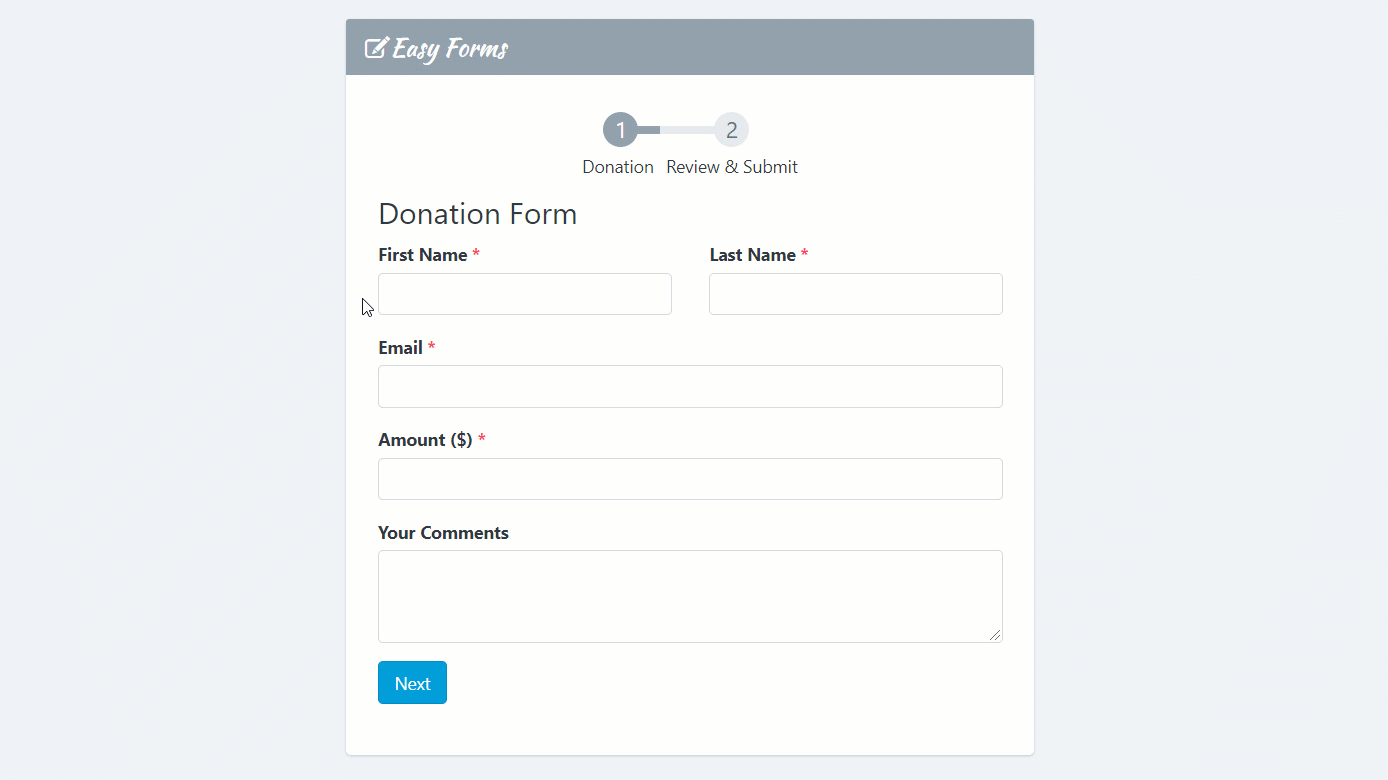
Now your form should looks like this: