• Home
  • Blog
  • Documentation
  • FAQ
    • Pre-Sales Questions
  • Log In
  • Get Easy Forms
  • Home
  • Blog
  • Documentation
  • FAQ
    • Pre-Sales Questions
  • Log In
  • Get Easy Forms
home/Knowledge Base/Advanced Techniques/How to Display Radio Buttons as Buttons
Popular Search:Getting Started

How to Display Radio Buttons as Buttons

431 views 2 August 7, 2020 admin

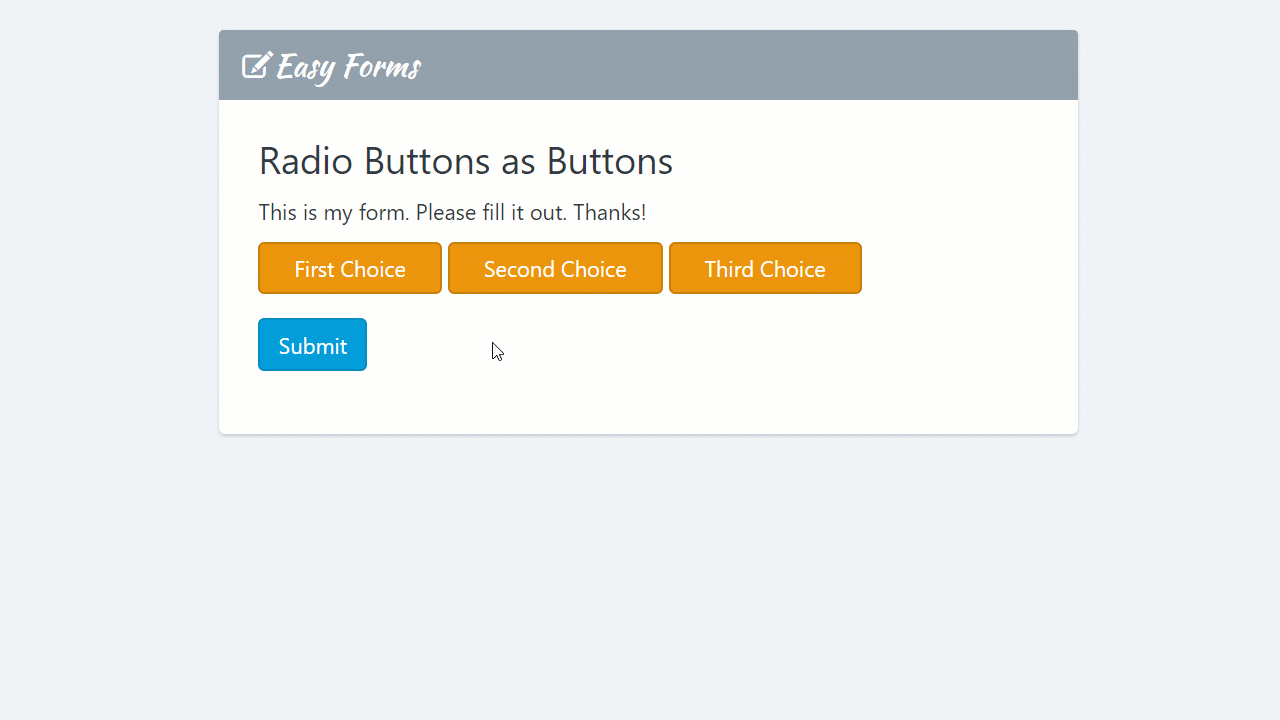
Would you like to customize the Radio input fields to look like buttons? You could even style the buttons to have the color you need to match your company branding. In this tutorial, we’ll show you how to use CSS to customize these form fields.

Customize Radio Fields to Look Like Buttons

Steps:

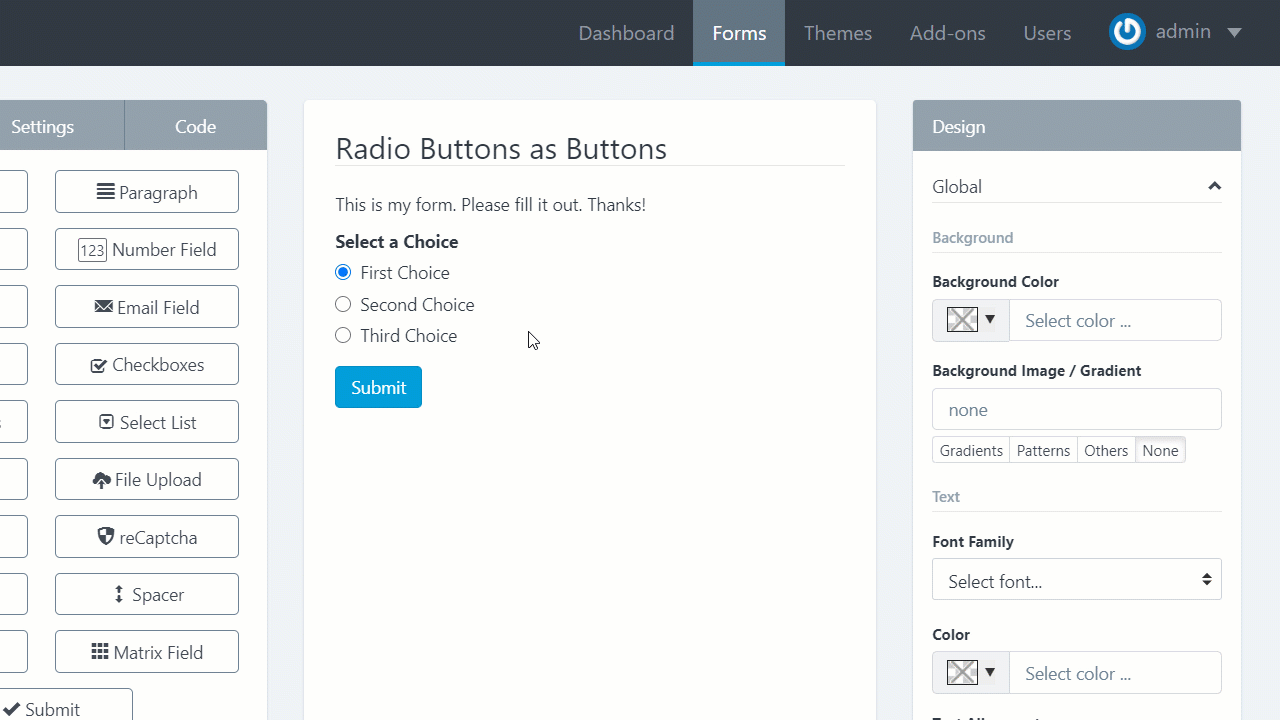
1. With the form builder add a Radio Button component. By default, Radio Buttons appear with a radio in front of the label to be checked.

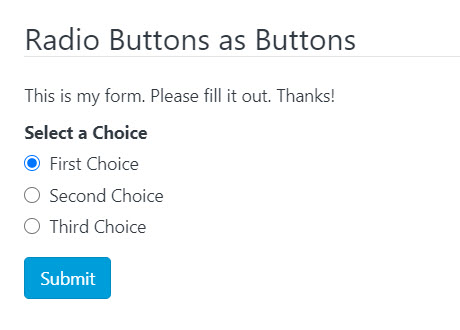
2. Click the Radio Buttons fields and uncheck the first option and add the following Container CSS Class: btn-group.

3. Go to Themes -> Create Theme and use the following CSS code:

.btn-group .radio {
    display: inline-block;
    margin-bottom: 0;
    font-weight: normal;
    text-align: center;
    white-space: nowrap;
    touch-action: manipulation;
    cursor: pointer;
    background-image: none;
    border: 1px solid transparent;
    border-radius: 4px;
    padding: 0;
    font-size: 14px;
    line-height: 1.42857143;    
    /*Colors*/
    color: #FFF;
    background-color: #eb950c;
    border-color: #c9800a;
}

.btn-group .radio:focus, .btn-group .radio:hover, .btn-group .radio input[type=radio]:checked + label {
    /*Colors*/
    color: #FFF;
    background-color: #c9800a;
    border-color: #8a5807;
}

.btn-group .control-label {
    display: none;
}

.btn-group .radio input {
    display: none;
}

.btn-group .radio label {
    padding: 6px 12px;
    width: 100%;
}

4. Finally, go to Forms -> Actions -> Settings -> UI Settings. And select the created theme.

That’s all!

Was this helpful?

2 Yes  No
Related Articles
  • Compare Date fields: How to ensure that Finish Date is at least equal to *or after* Start Date, and *not* before?
  • How to embed a Form using iFrame code
  • Dynamic Content: Conditional Logic with Dates
  • Date Based Conditional Logic
  • Calculate Difference of Time between Two Time fields
  • Date Formats with Dynamic Content

Didn't find your answer? Contact Us

Leave A Comment Cancel reply

You must be logged in to post a comment.

Advanced Techniques
  • How to Display Radio Buttons as Buttons
  • Compare Date fields: How to ensure that Finish Date is at least equal to *or after* Start Date, and *not* before?
  • How to embed a Form using iFrame code
  • Dynamic Content: Conditional Logic with Dates
  • Date Based Conditional Logic
  • Calculate Difference of Time between Two Time fields
View All 21  
Popular Articles
  • How to Show/Hide HTML elements with Conditional Rules
  • How to enable / disable DEBUG mode
  • How to Submit a Form as WhatsApp Message
  • How to update Form Stats from the command line
  • How to compare two fields to pass the validation (jQuery Validation)
KB Categories
  • Add-Ons
  • Advanced Techniques
  • Common Issues & Troubleshooting
  • Developers "How To's"
  • Getting Started
  • How To

  How to embed a Form using iFrame code

How to create Calculation Forms (BMI Calculator with Math Formulas)  

About Easy Forms

With Easy Forms you can create unlimited web forms and most importantly the complete management of them without paying monthly fees

Resources
  • Knowledge Base
  • Documentation
  • Pre-sales Questions
  • Blog
Useful Help Links
  • Get Easy Forms
  • Live Demo
  • License Terms
  • Contact Us
Frequent Visit Links
  • Pre-Sales Questions
  • System Requirements
  • Installing Easy Forms
  • Upgrading Easy Forms
  • Privacy Policy
  • © 2015 - 2024 Baluart EIRL. All Rights Reserved.

Popular Search:Getting Started