Do you want to send bulk emails to users who have filled a form? In this tutorial we will show you how to configure the Email Campaigns add-on to send a mass email with Easy Forms + Amazon SES and SNS.
Requirements:
– Email Campaigns Add-On
Step 1. Configure Mail Settings with Amazon SES
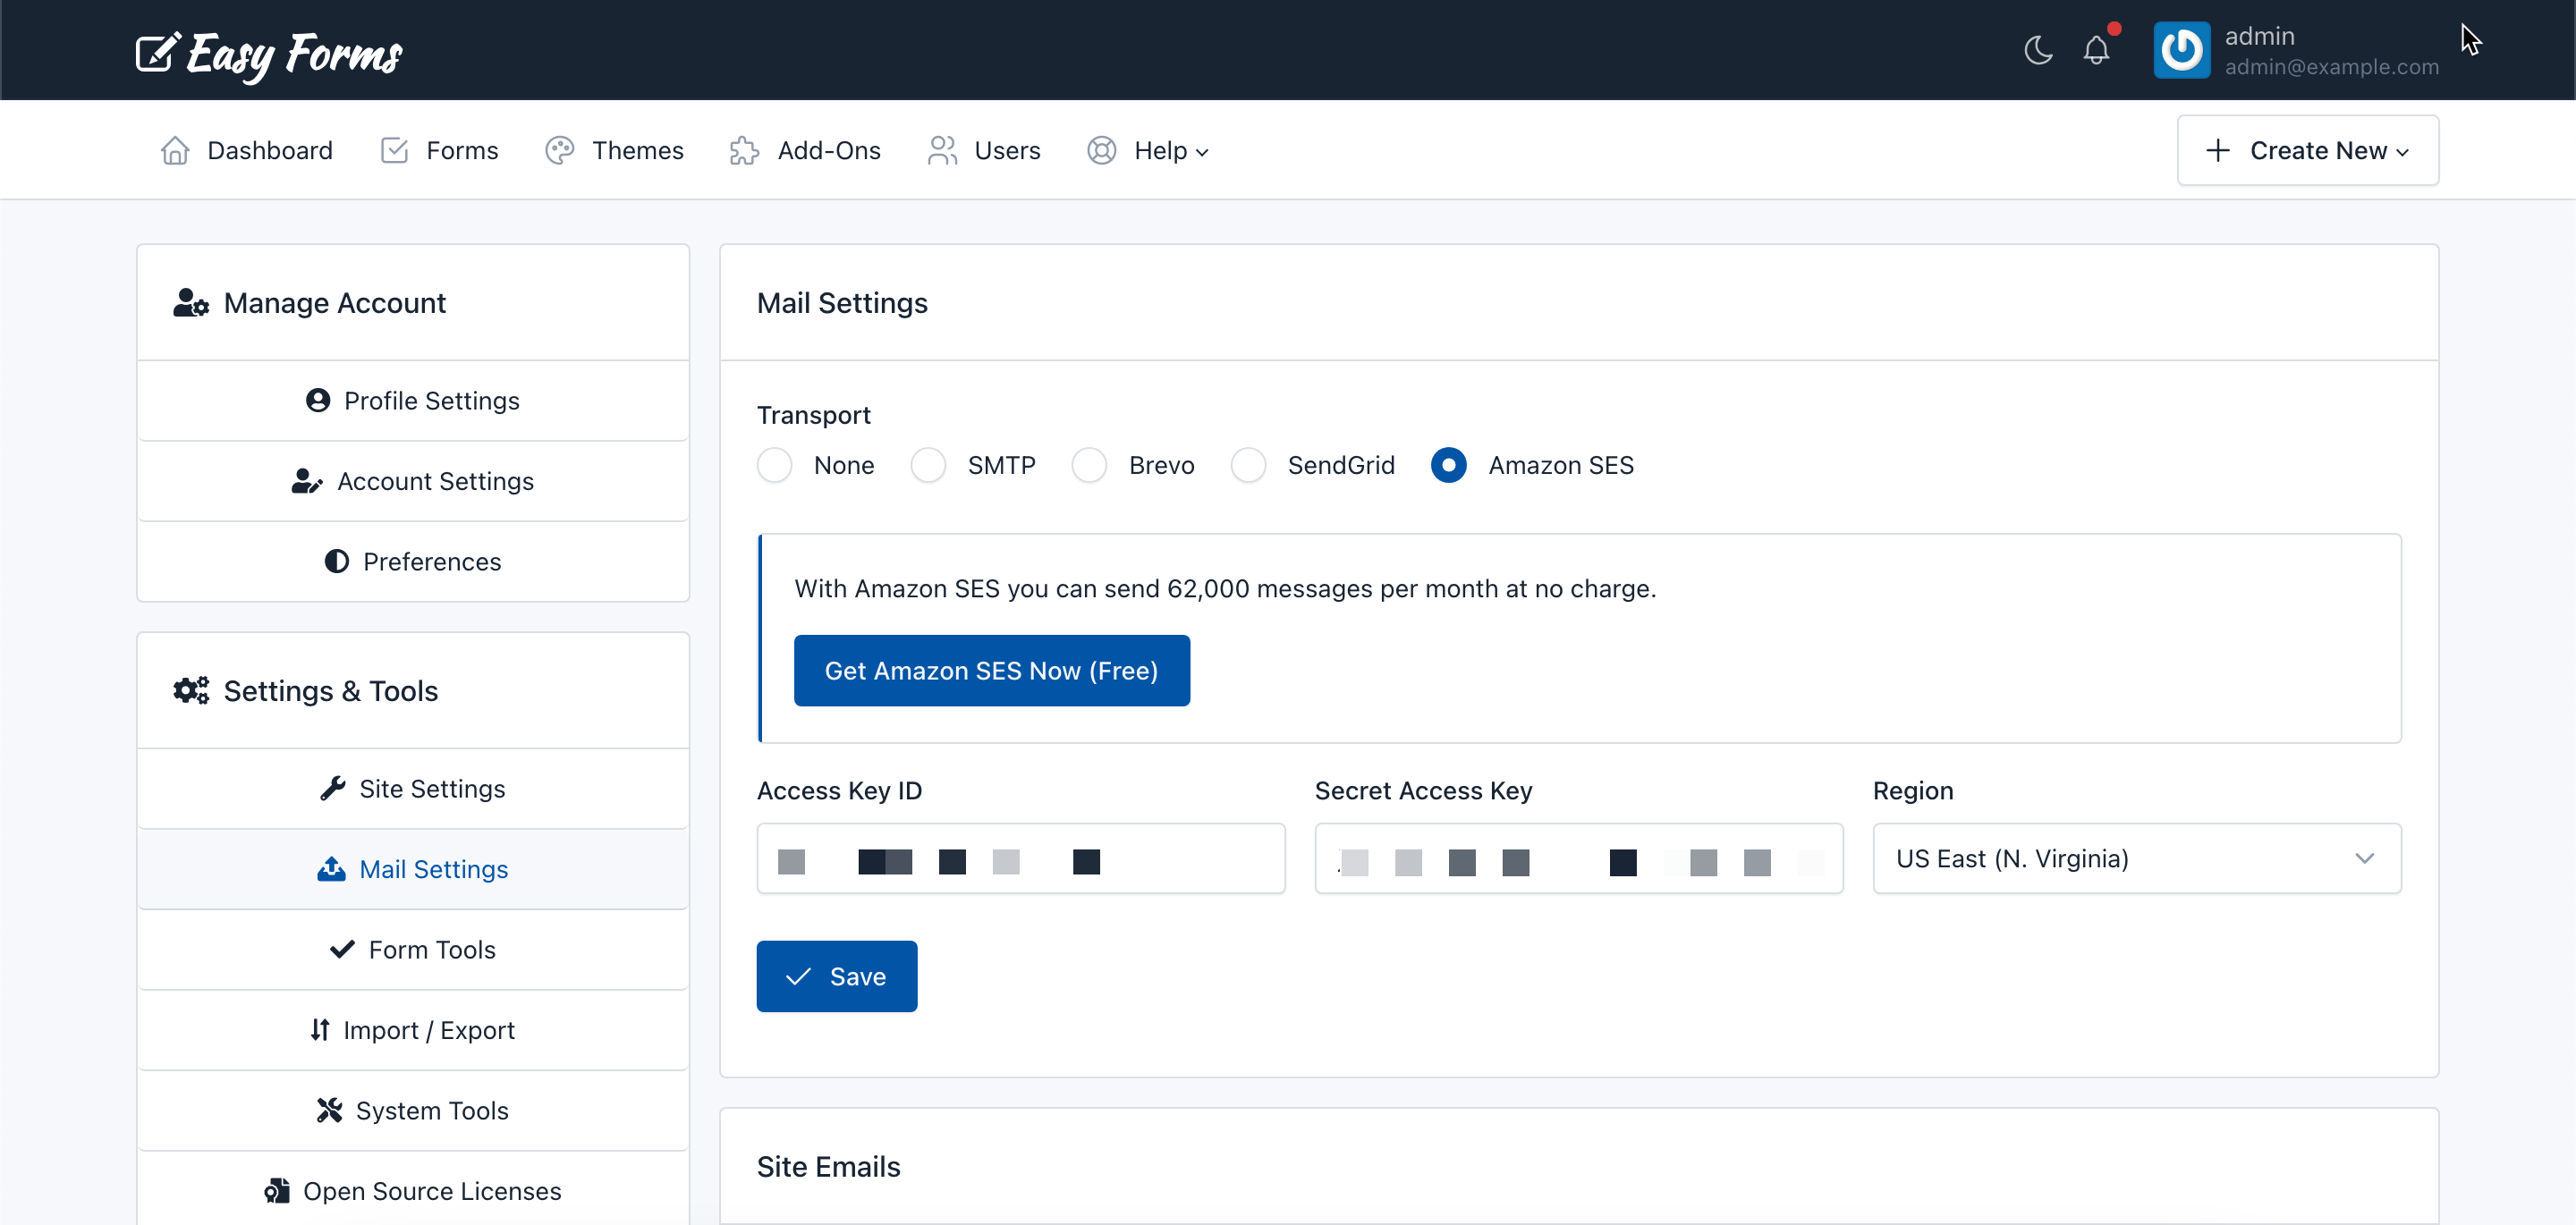
Just follow these steps:
- Go to Site Settings > Mail Settings
- Select “Amazon SES” and enter:
– Access Key ID
– Secret Access Key
– Region
From now, all the outgoing emails from Easy Forms will use the Amazon SES. - Send a Test Email to confirm your integration with Amazon SES works.
Step 2. Configure the Email Campaigns add-on with Amazon SNS
Amazon SNS (Simple Notification Service) operates as a managed pub/sub messaging system, overseeing the scaling and coordination of message distribution to various subscribers and endpoints such as HTTP.
In our case, we are going to use Amazon SNS to get a notification every time Amazon SES detects an email is bounced. Email bounces occur when the delivery of a message fails, and the server kicks it back to the sender.
The Email Campaigns add-on will help you to detect what emails bounce, so you will be able to take the respective actions to remove those invalid records.
To configure Amazon SNS with Easy Forms follow the next steps:
i. Create a SNS Topic that sends the notification to your Easy Forms instance:
- Go to your AWS account.
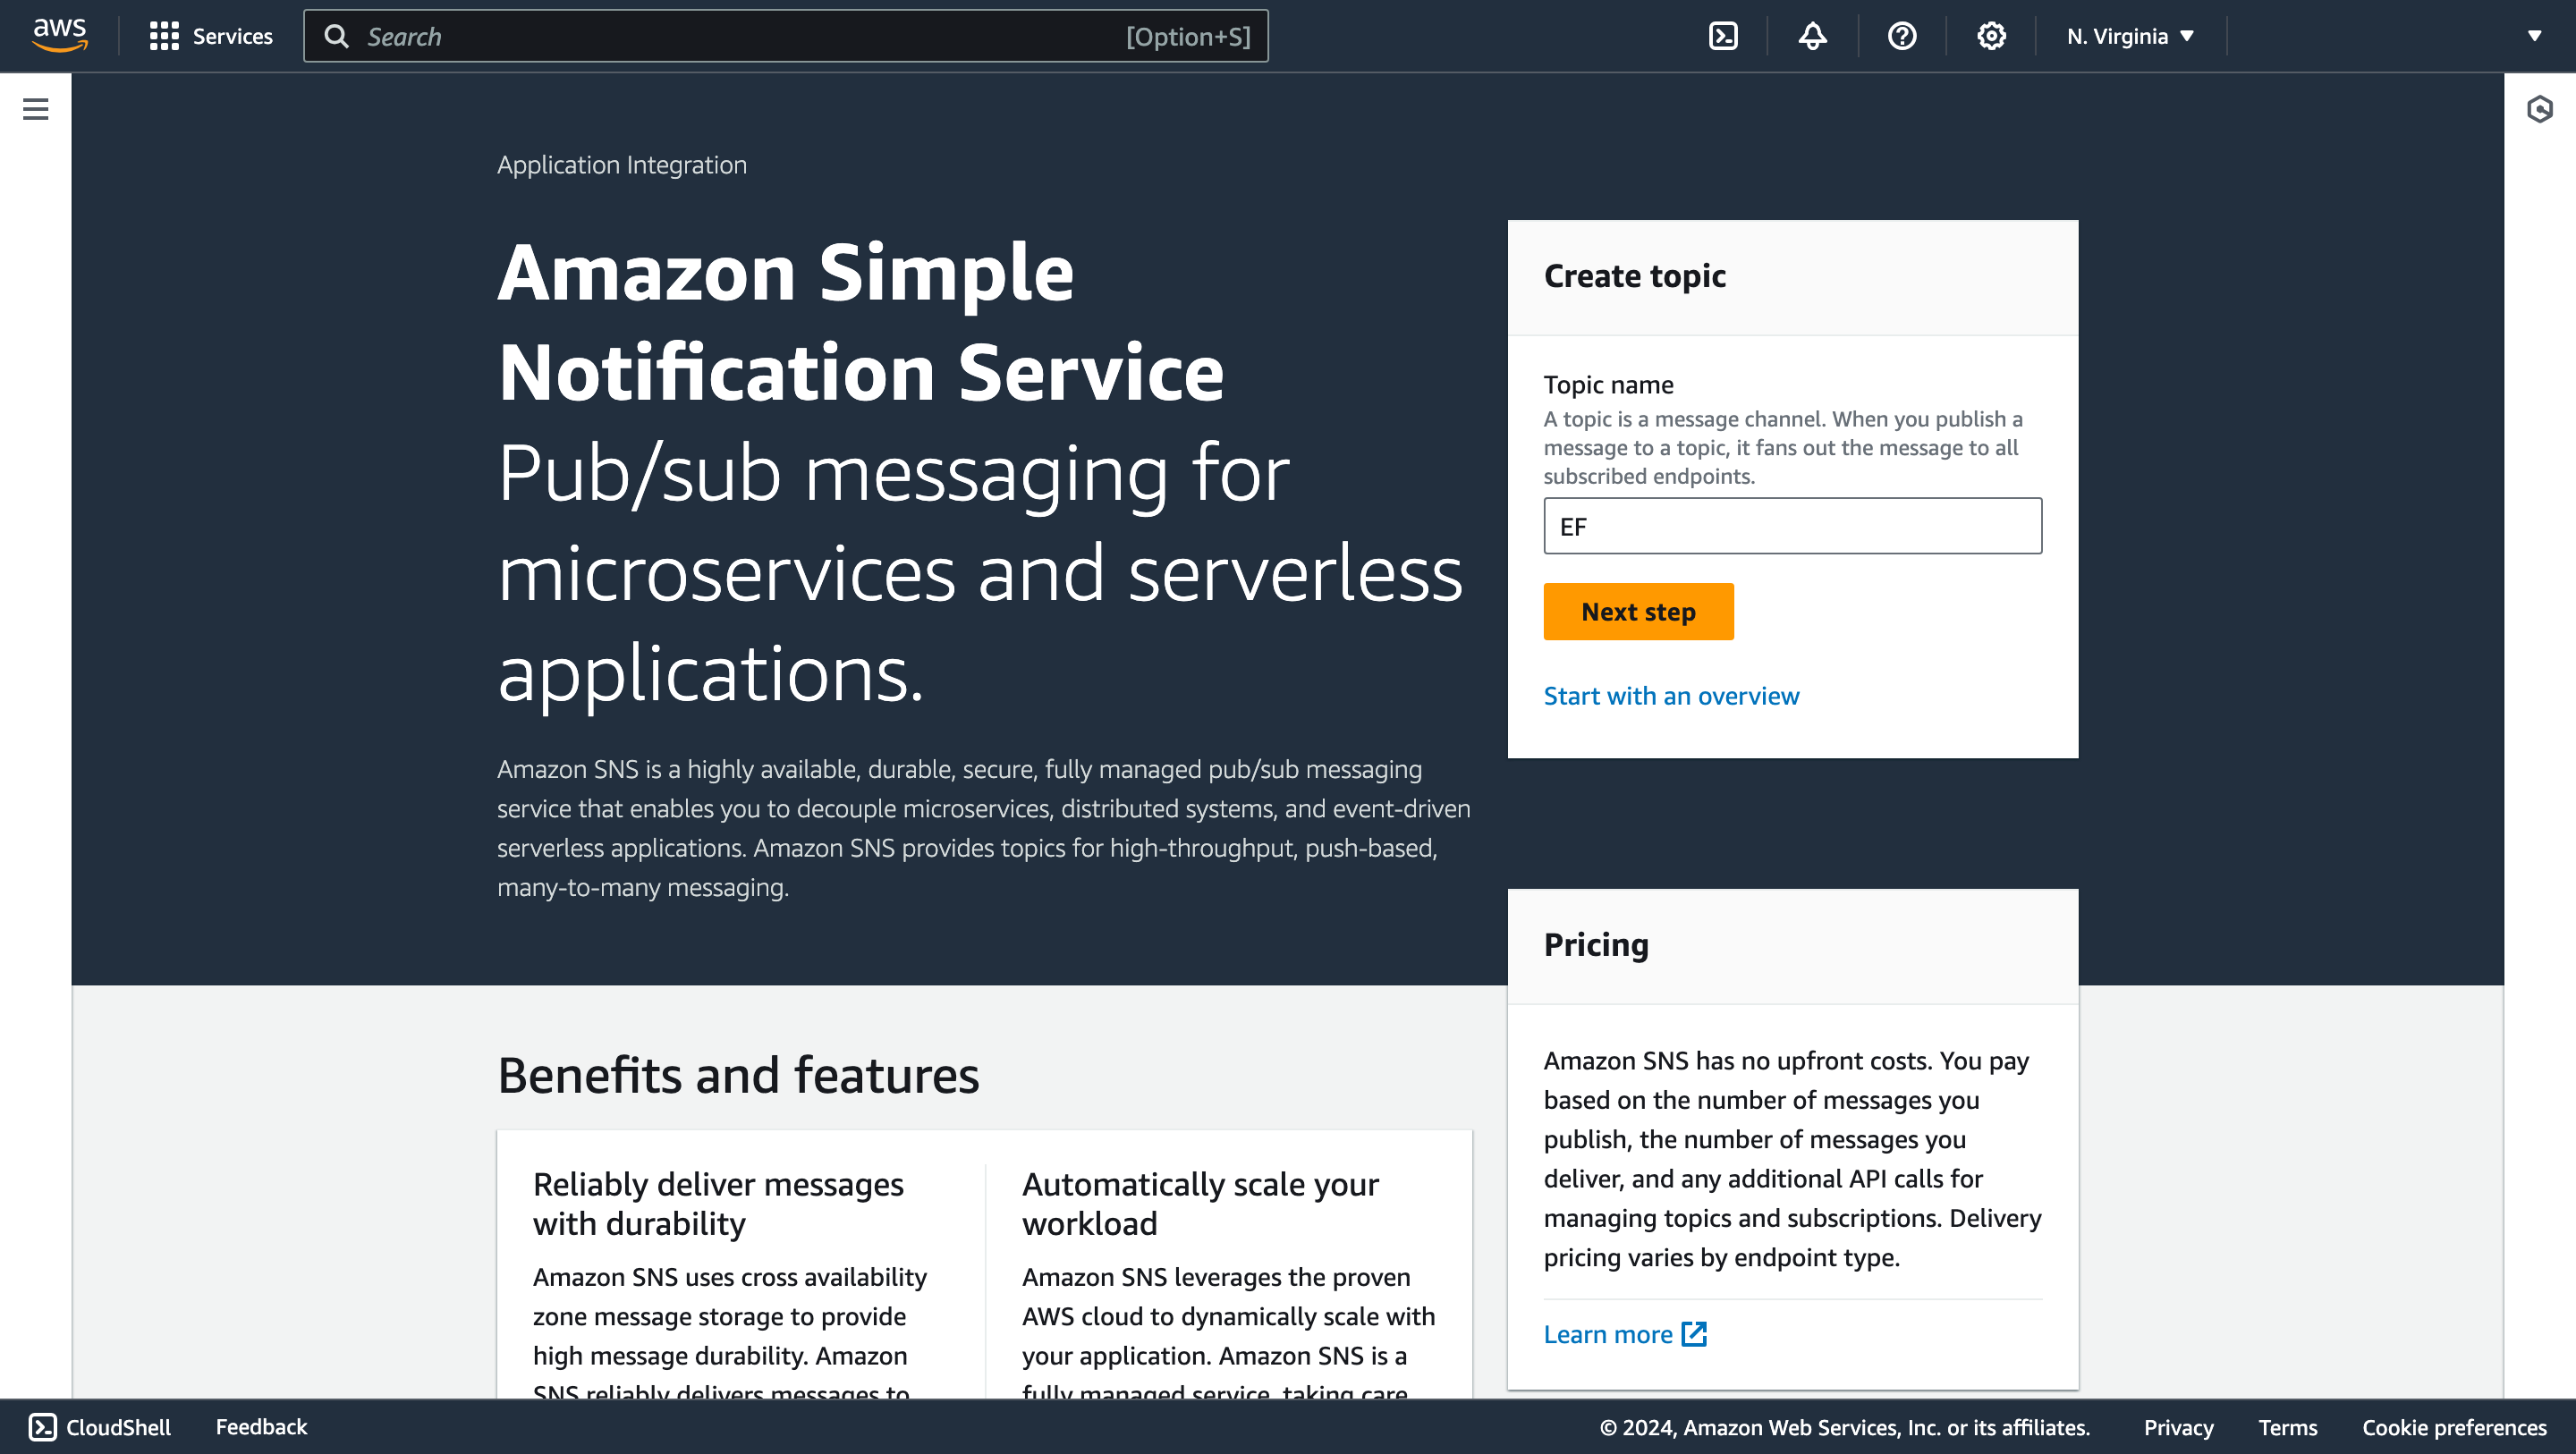
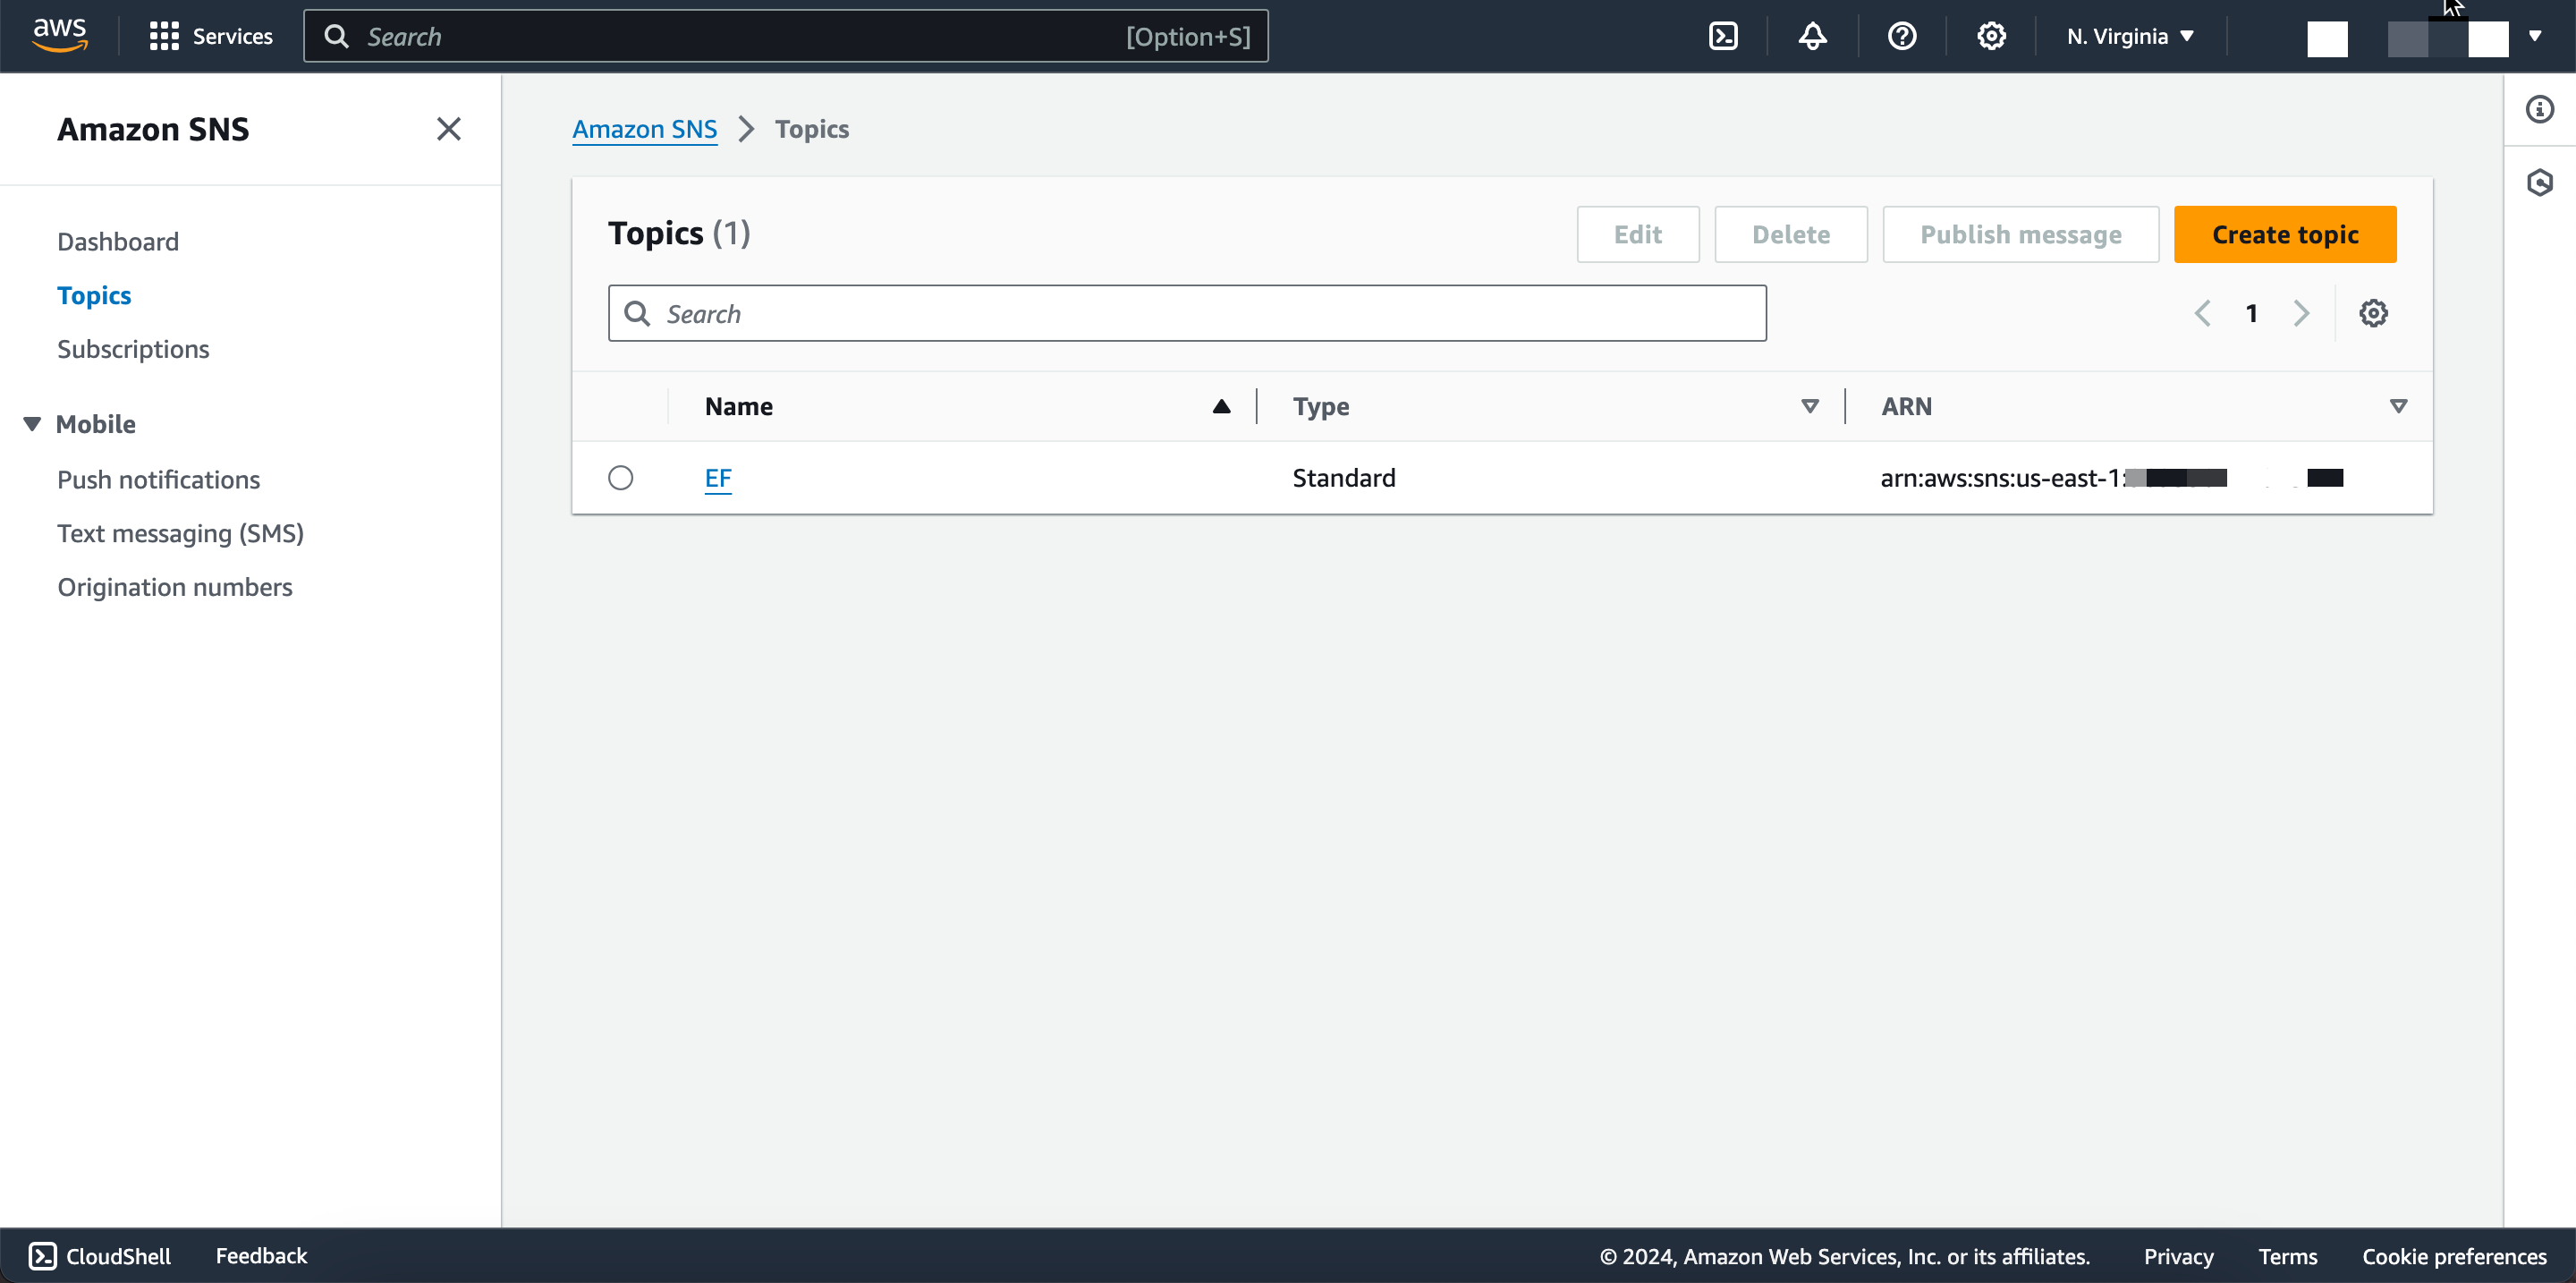
- Search for SNS, click on it, choose “Topics” in the left navigation pane, and click “Create topic”.
- Select the topic type: “Standard”, and provide a name.
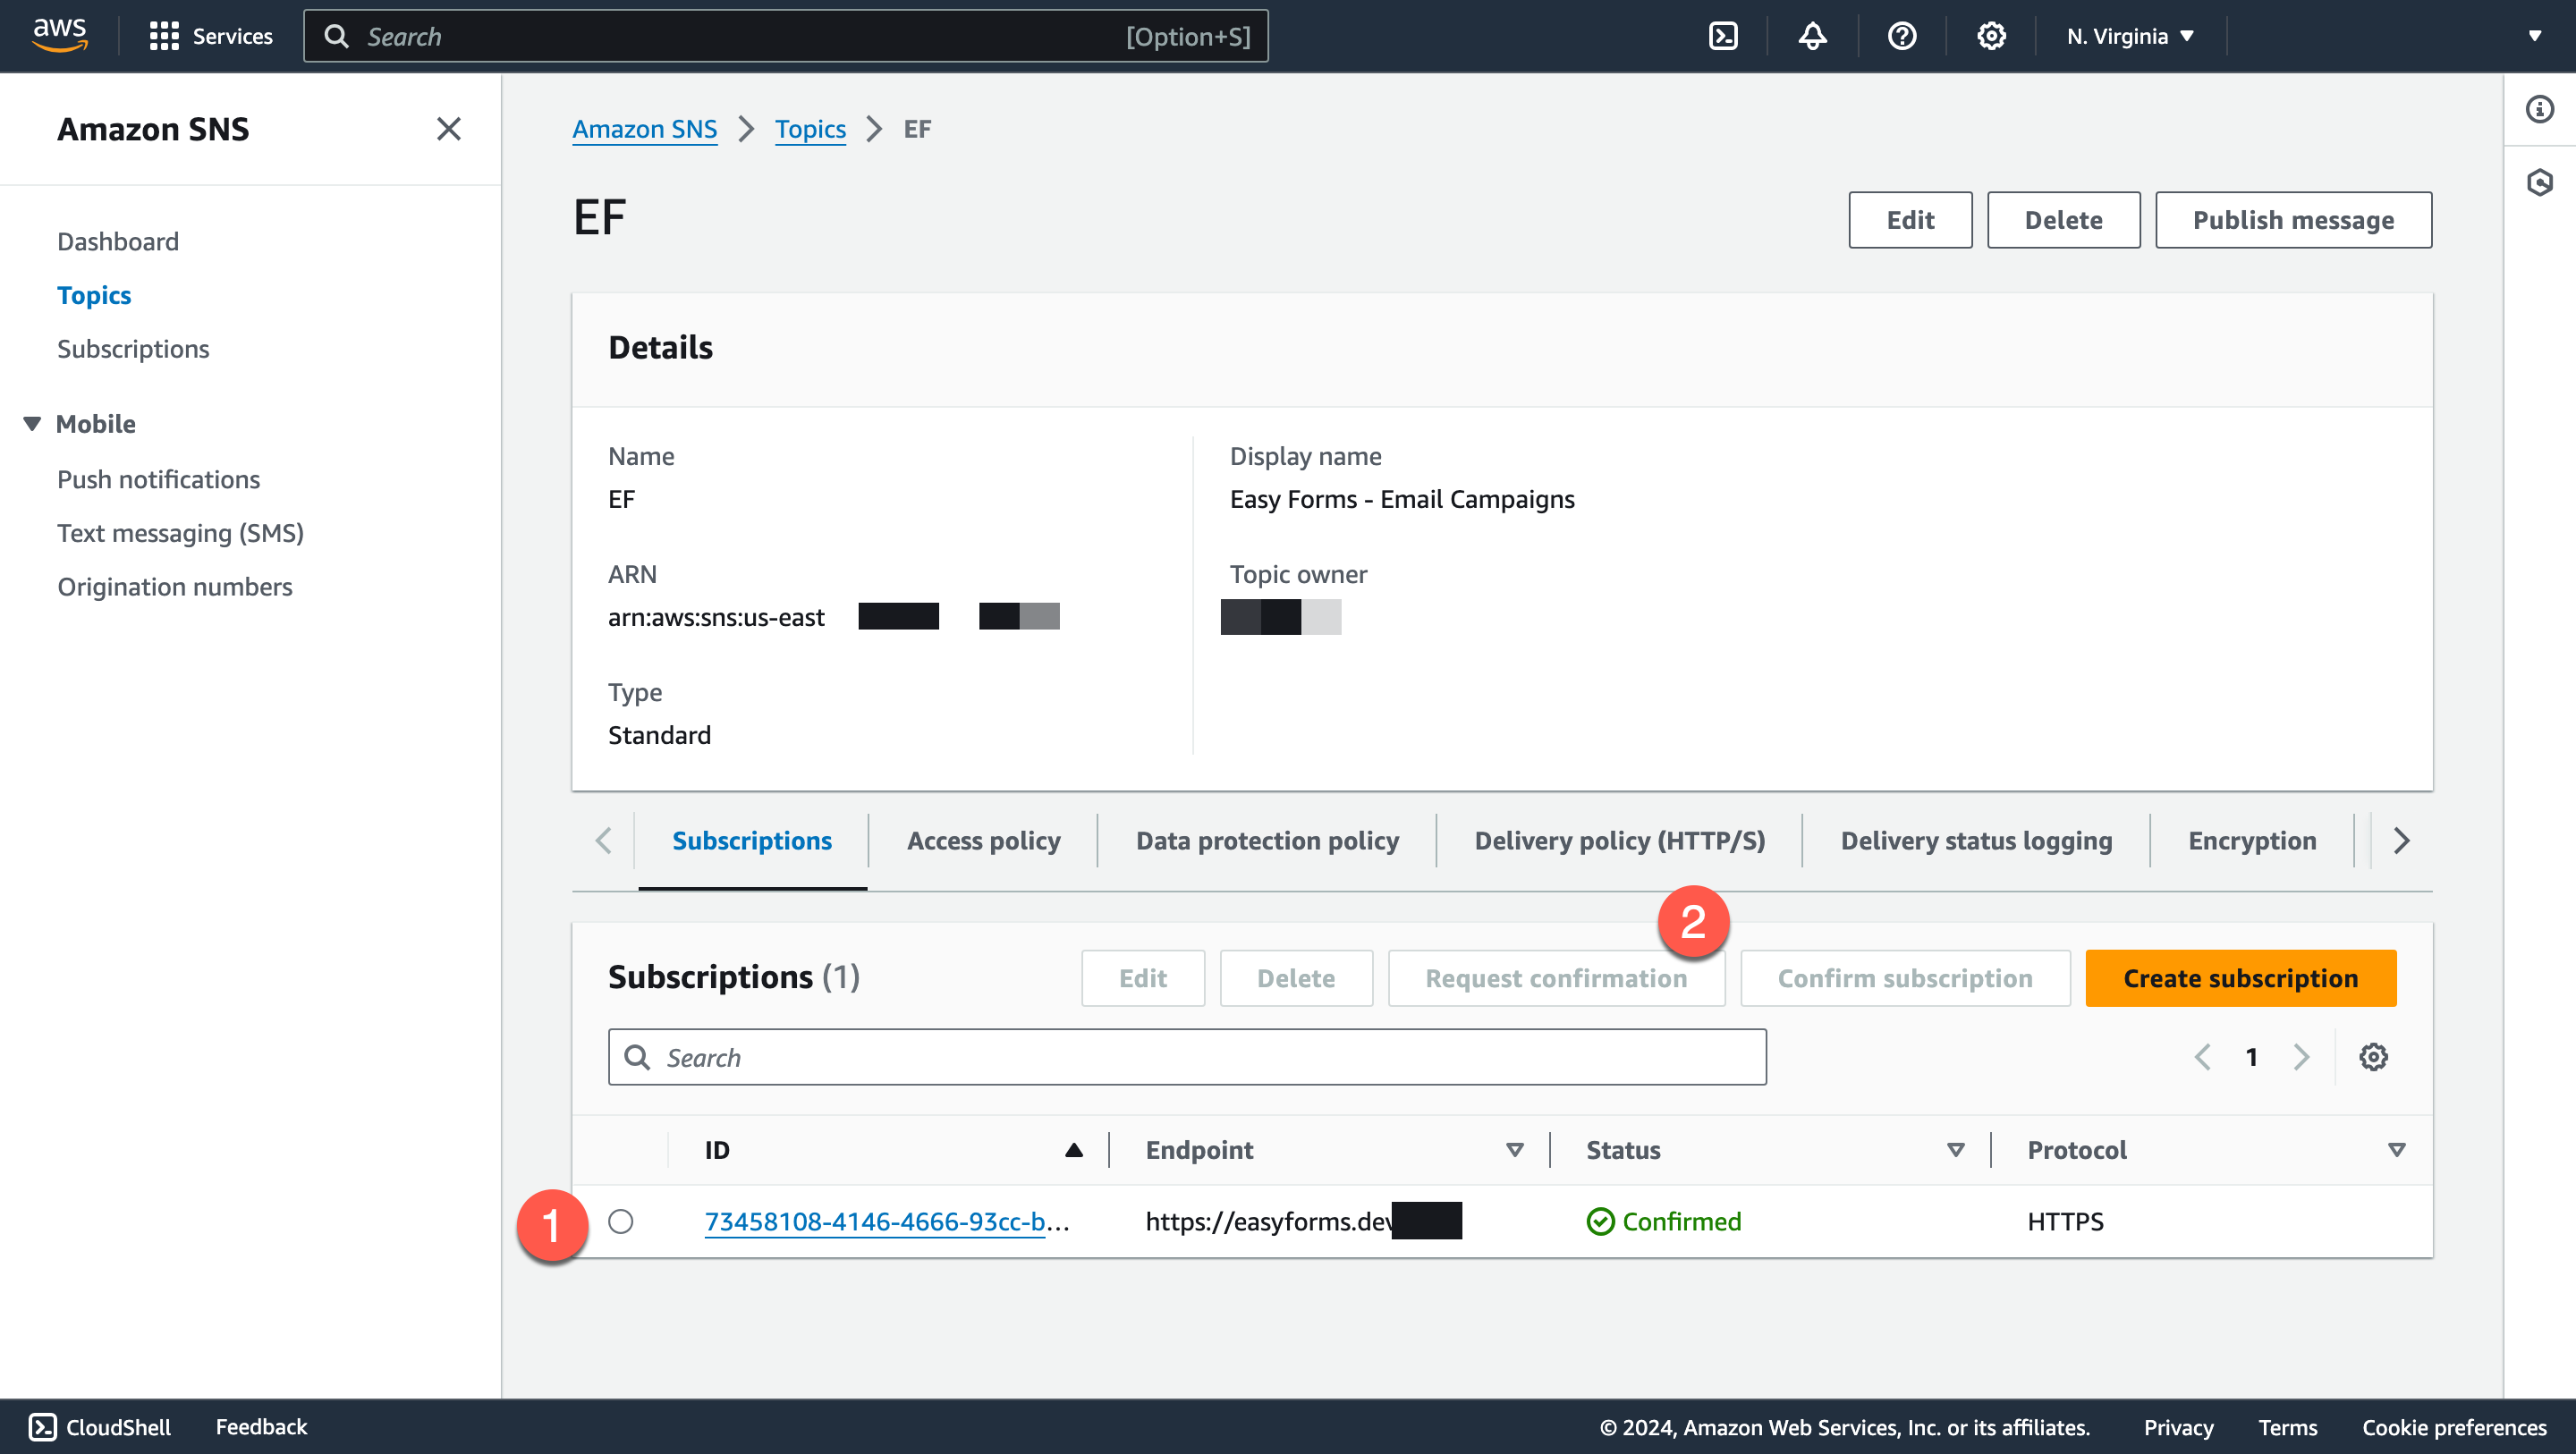
- Now, click on “Create Subscription” under the Subscription tab.
- In Protocol, select HTTP or HTTPS, and enter https://example.com/addons/email_campaign/handle/webhook in Endpoint, click Save.
- Now in the Subscriptions section, select the Subscription recently created and click “Request Confirmation”.
- Wait some seconds and refresh the page. The Subscriptions Status will change to “Confirmed”.
- That is all.
ii. Integrate SES with SNS to send notifications when an email is bounced
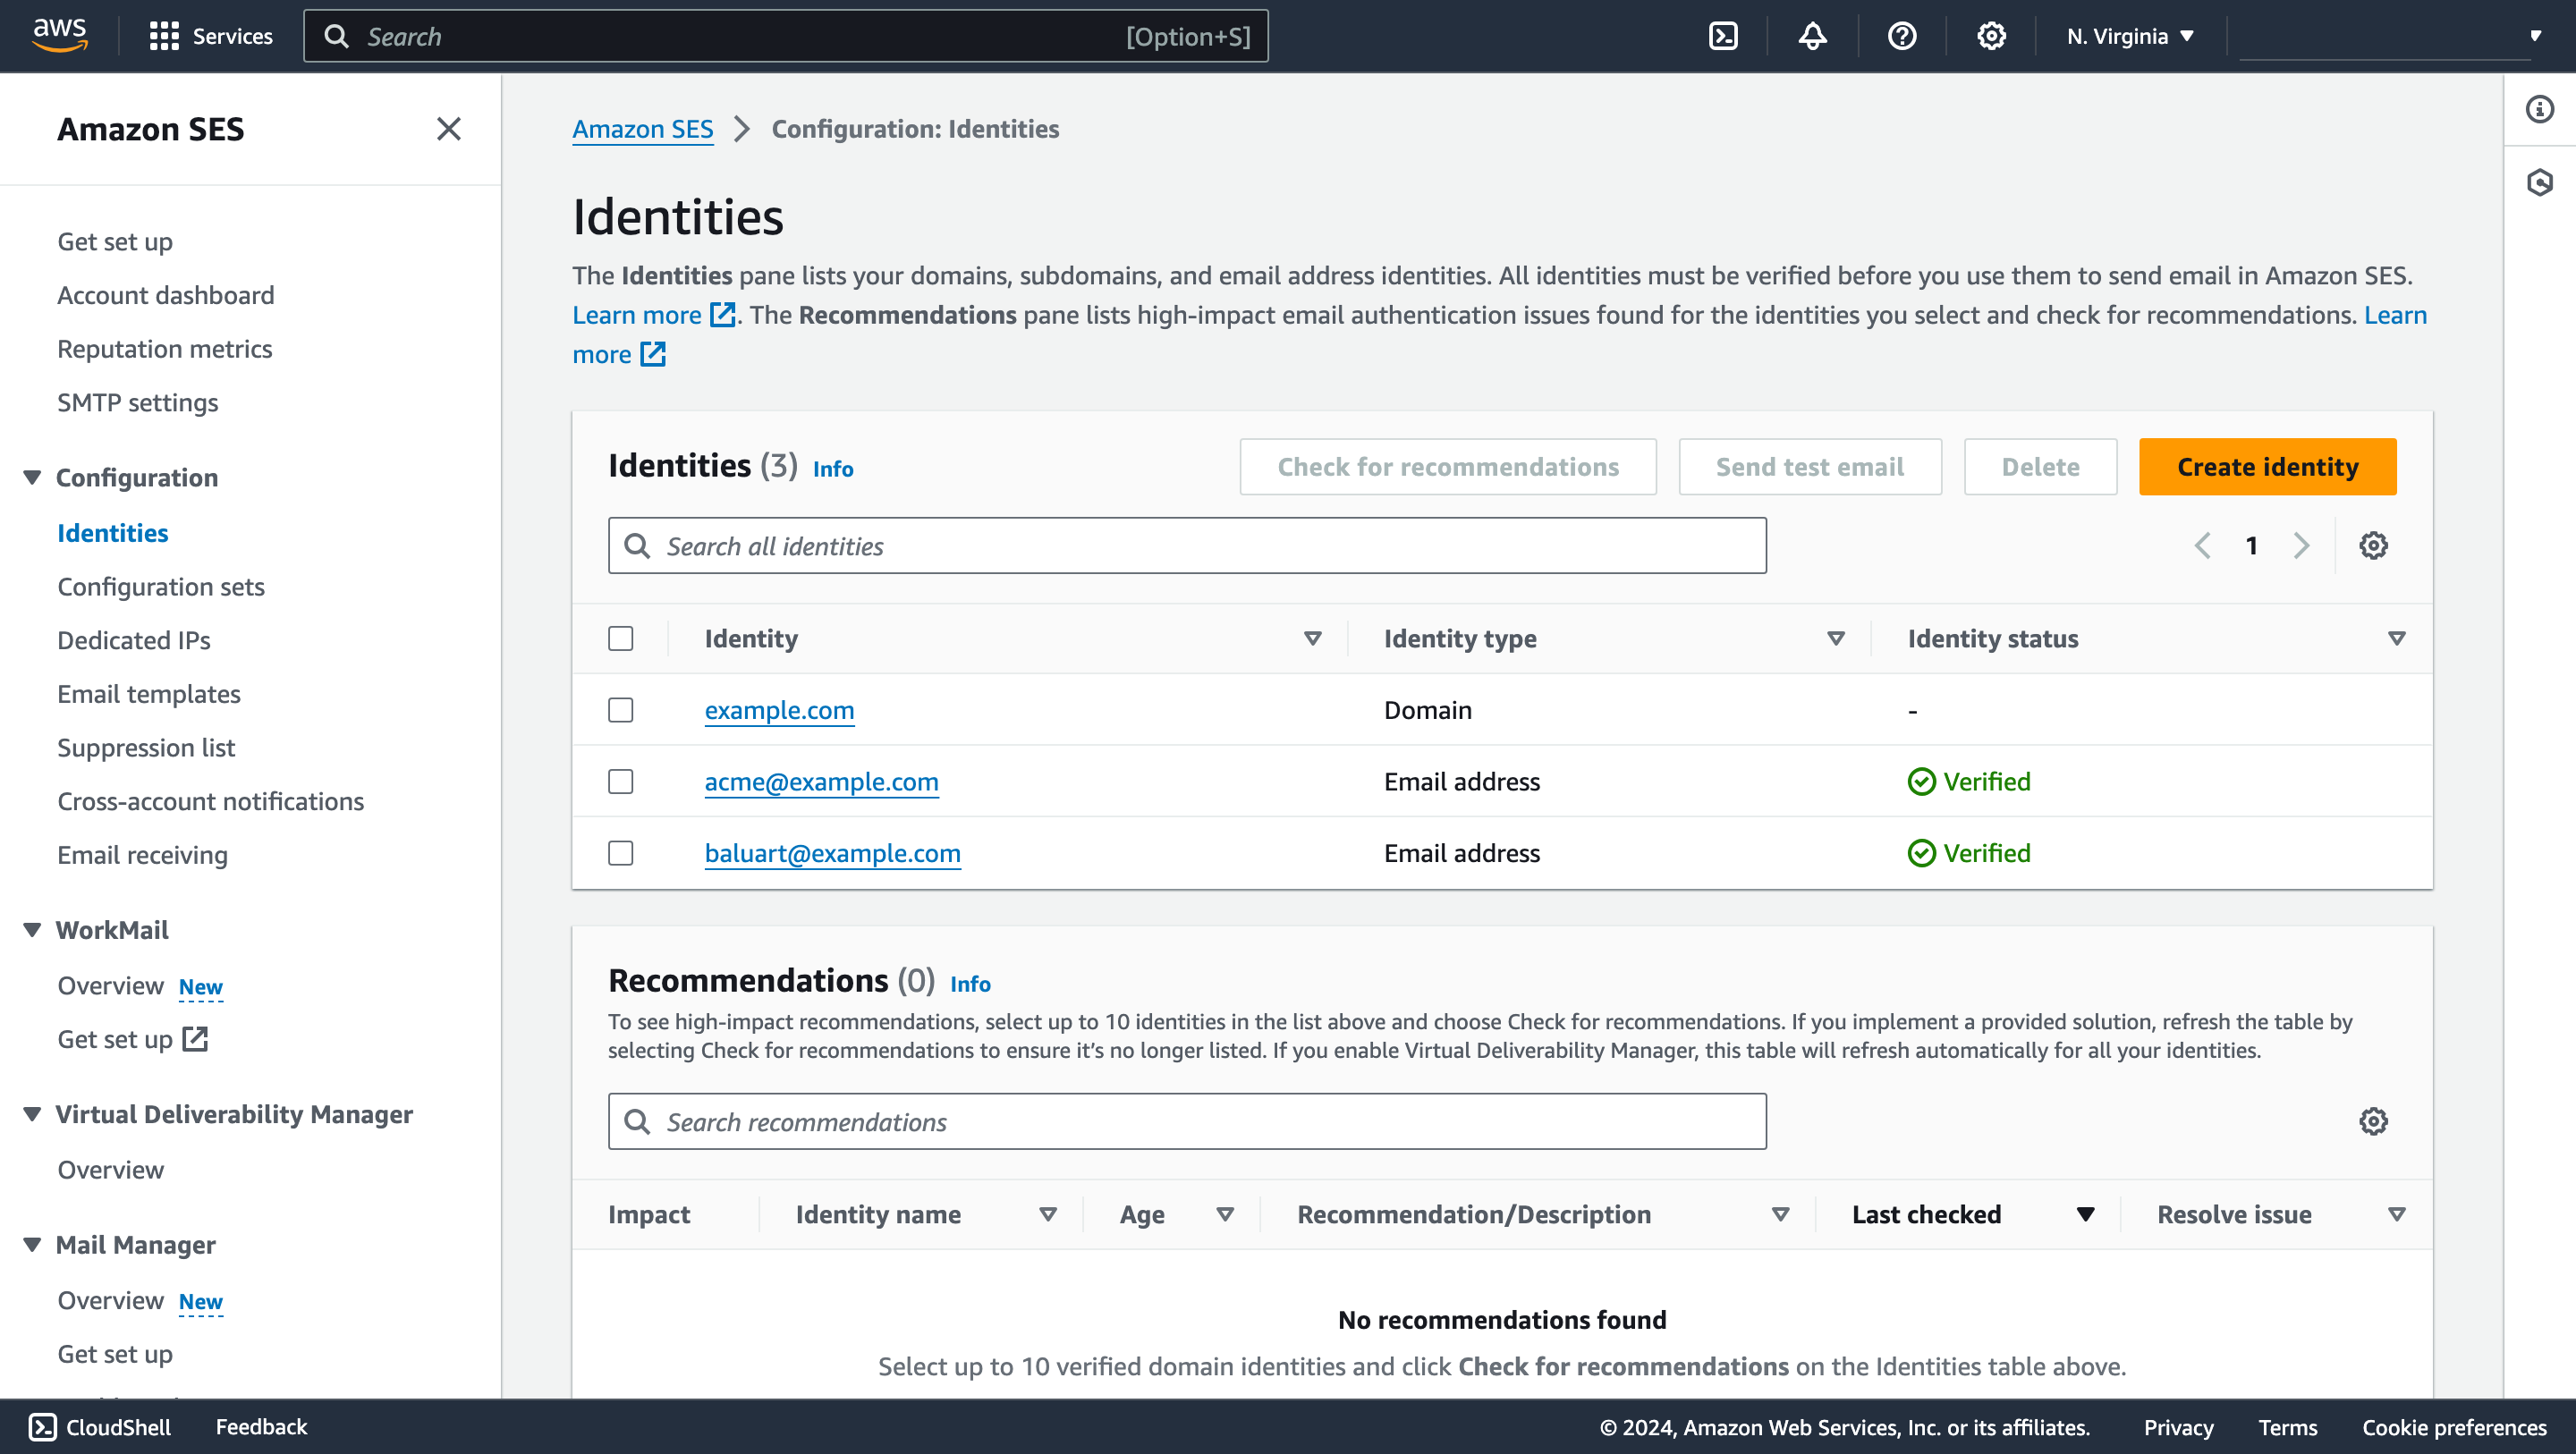
- First, go to SES and click on Verified Identities.
- Find your added identities in the list.
- To enable notifications for a specific identity, click it, access its details, and go to the Notifications tab.
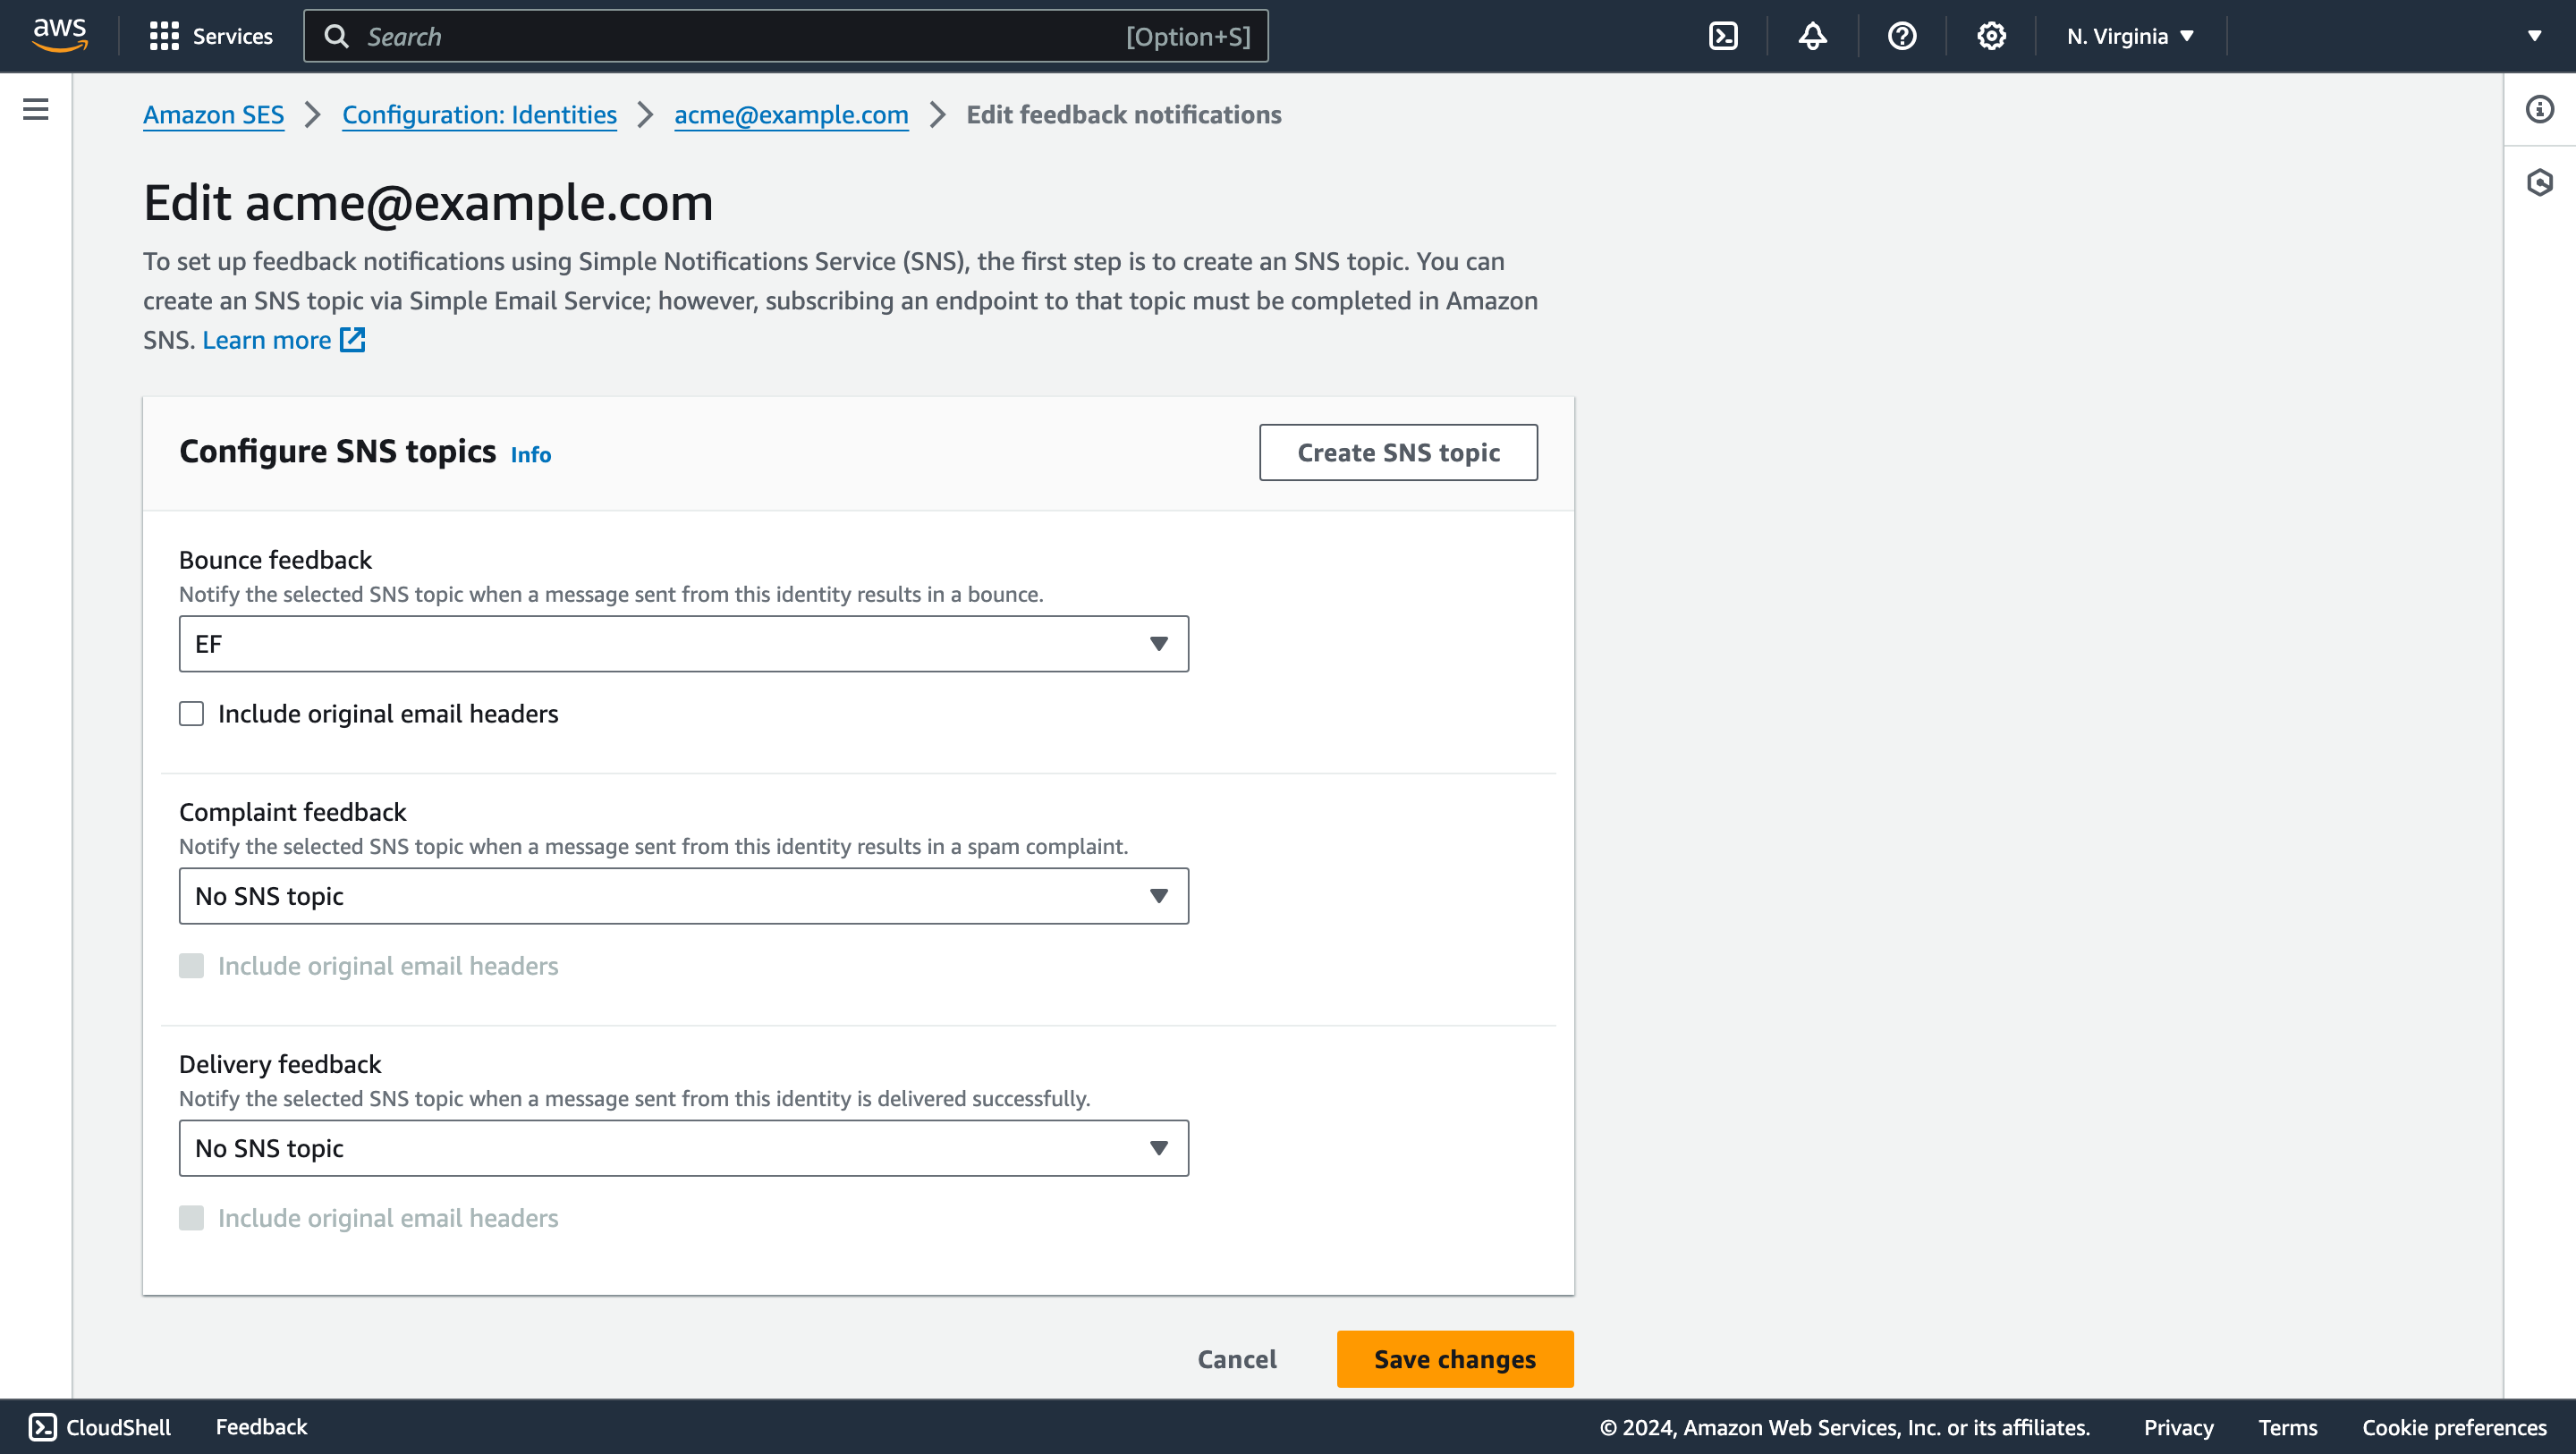
- You’ll find Feedback notifications. Click “edit” on the right.
- On this page, you will find three notification types. You just need to click on “Bounce feedback” and select the SNS Topic you recently created.
- That is all.
With these settings, the application gets notified when emails are bounced
Now we are ready to send our first campaign.
Step 3. Create an Email Template
An email template will be used to generate dinamically the message body. The advantage of this is that you can use dynamic content to merge data collected by your forms within the message body.
To Create an Email Template follow these steps:
- Go to Add-Ons > Email Campaigns > Click the Down Arrow button > Click Create New Template
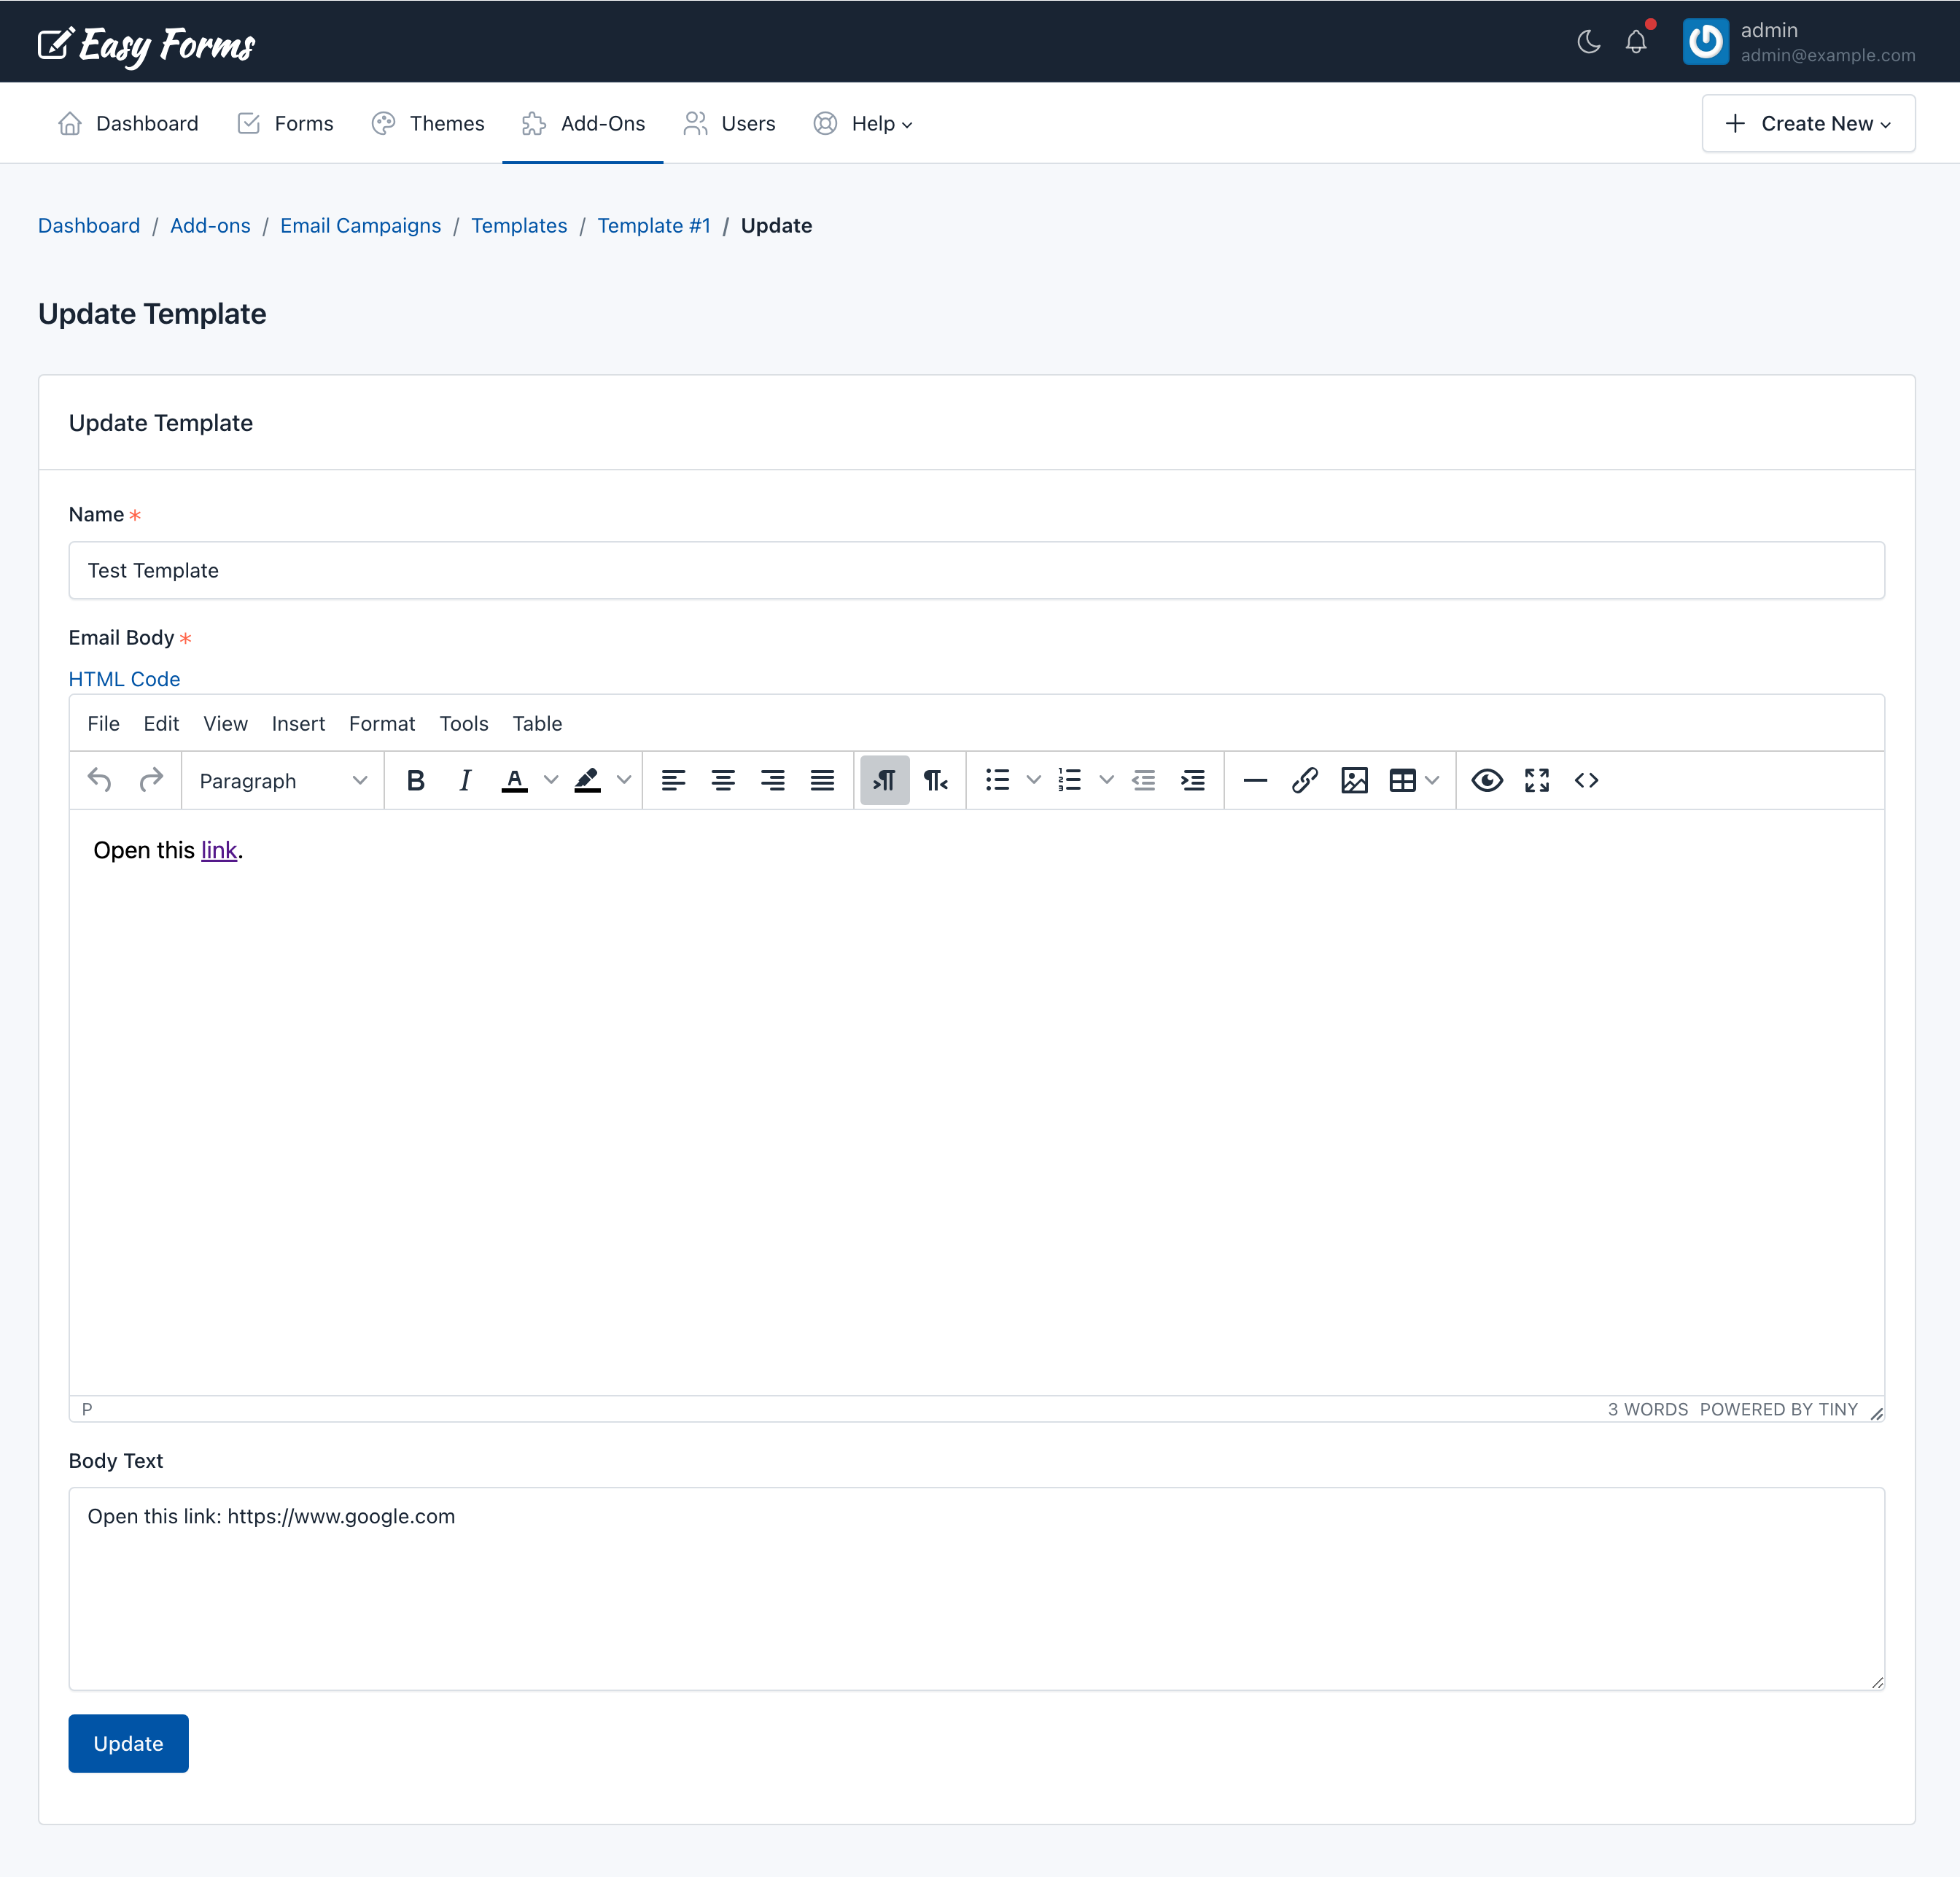
- Enter the Name (Administrative Name to identify the template in the system)
- Enter the Email Body: The html code that will be sent as message body.
- Enter the Body Text: The text that will be sent as message body for mail clients that don’t support HTML code.
- Click Save.
Now we are going to use the email template in our campaign.
Step 4. Configure an Email Campaign
Before you can send an email, you need to have a list of people to send it to, in our case, the list wll be the of users who has submitted a form.
Configure an Email Campaign is very straightforward, just follow these steps:
- Go to Add-Ons > Email Campaigns > Set Up a Form
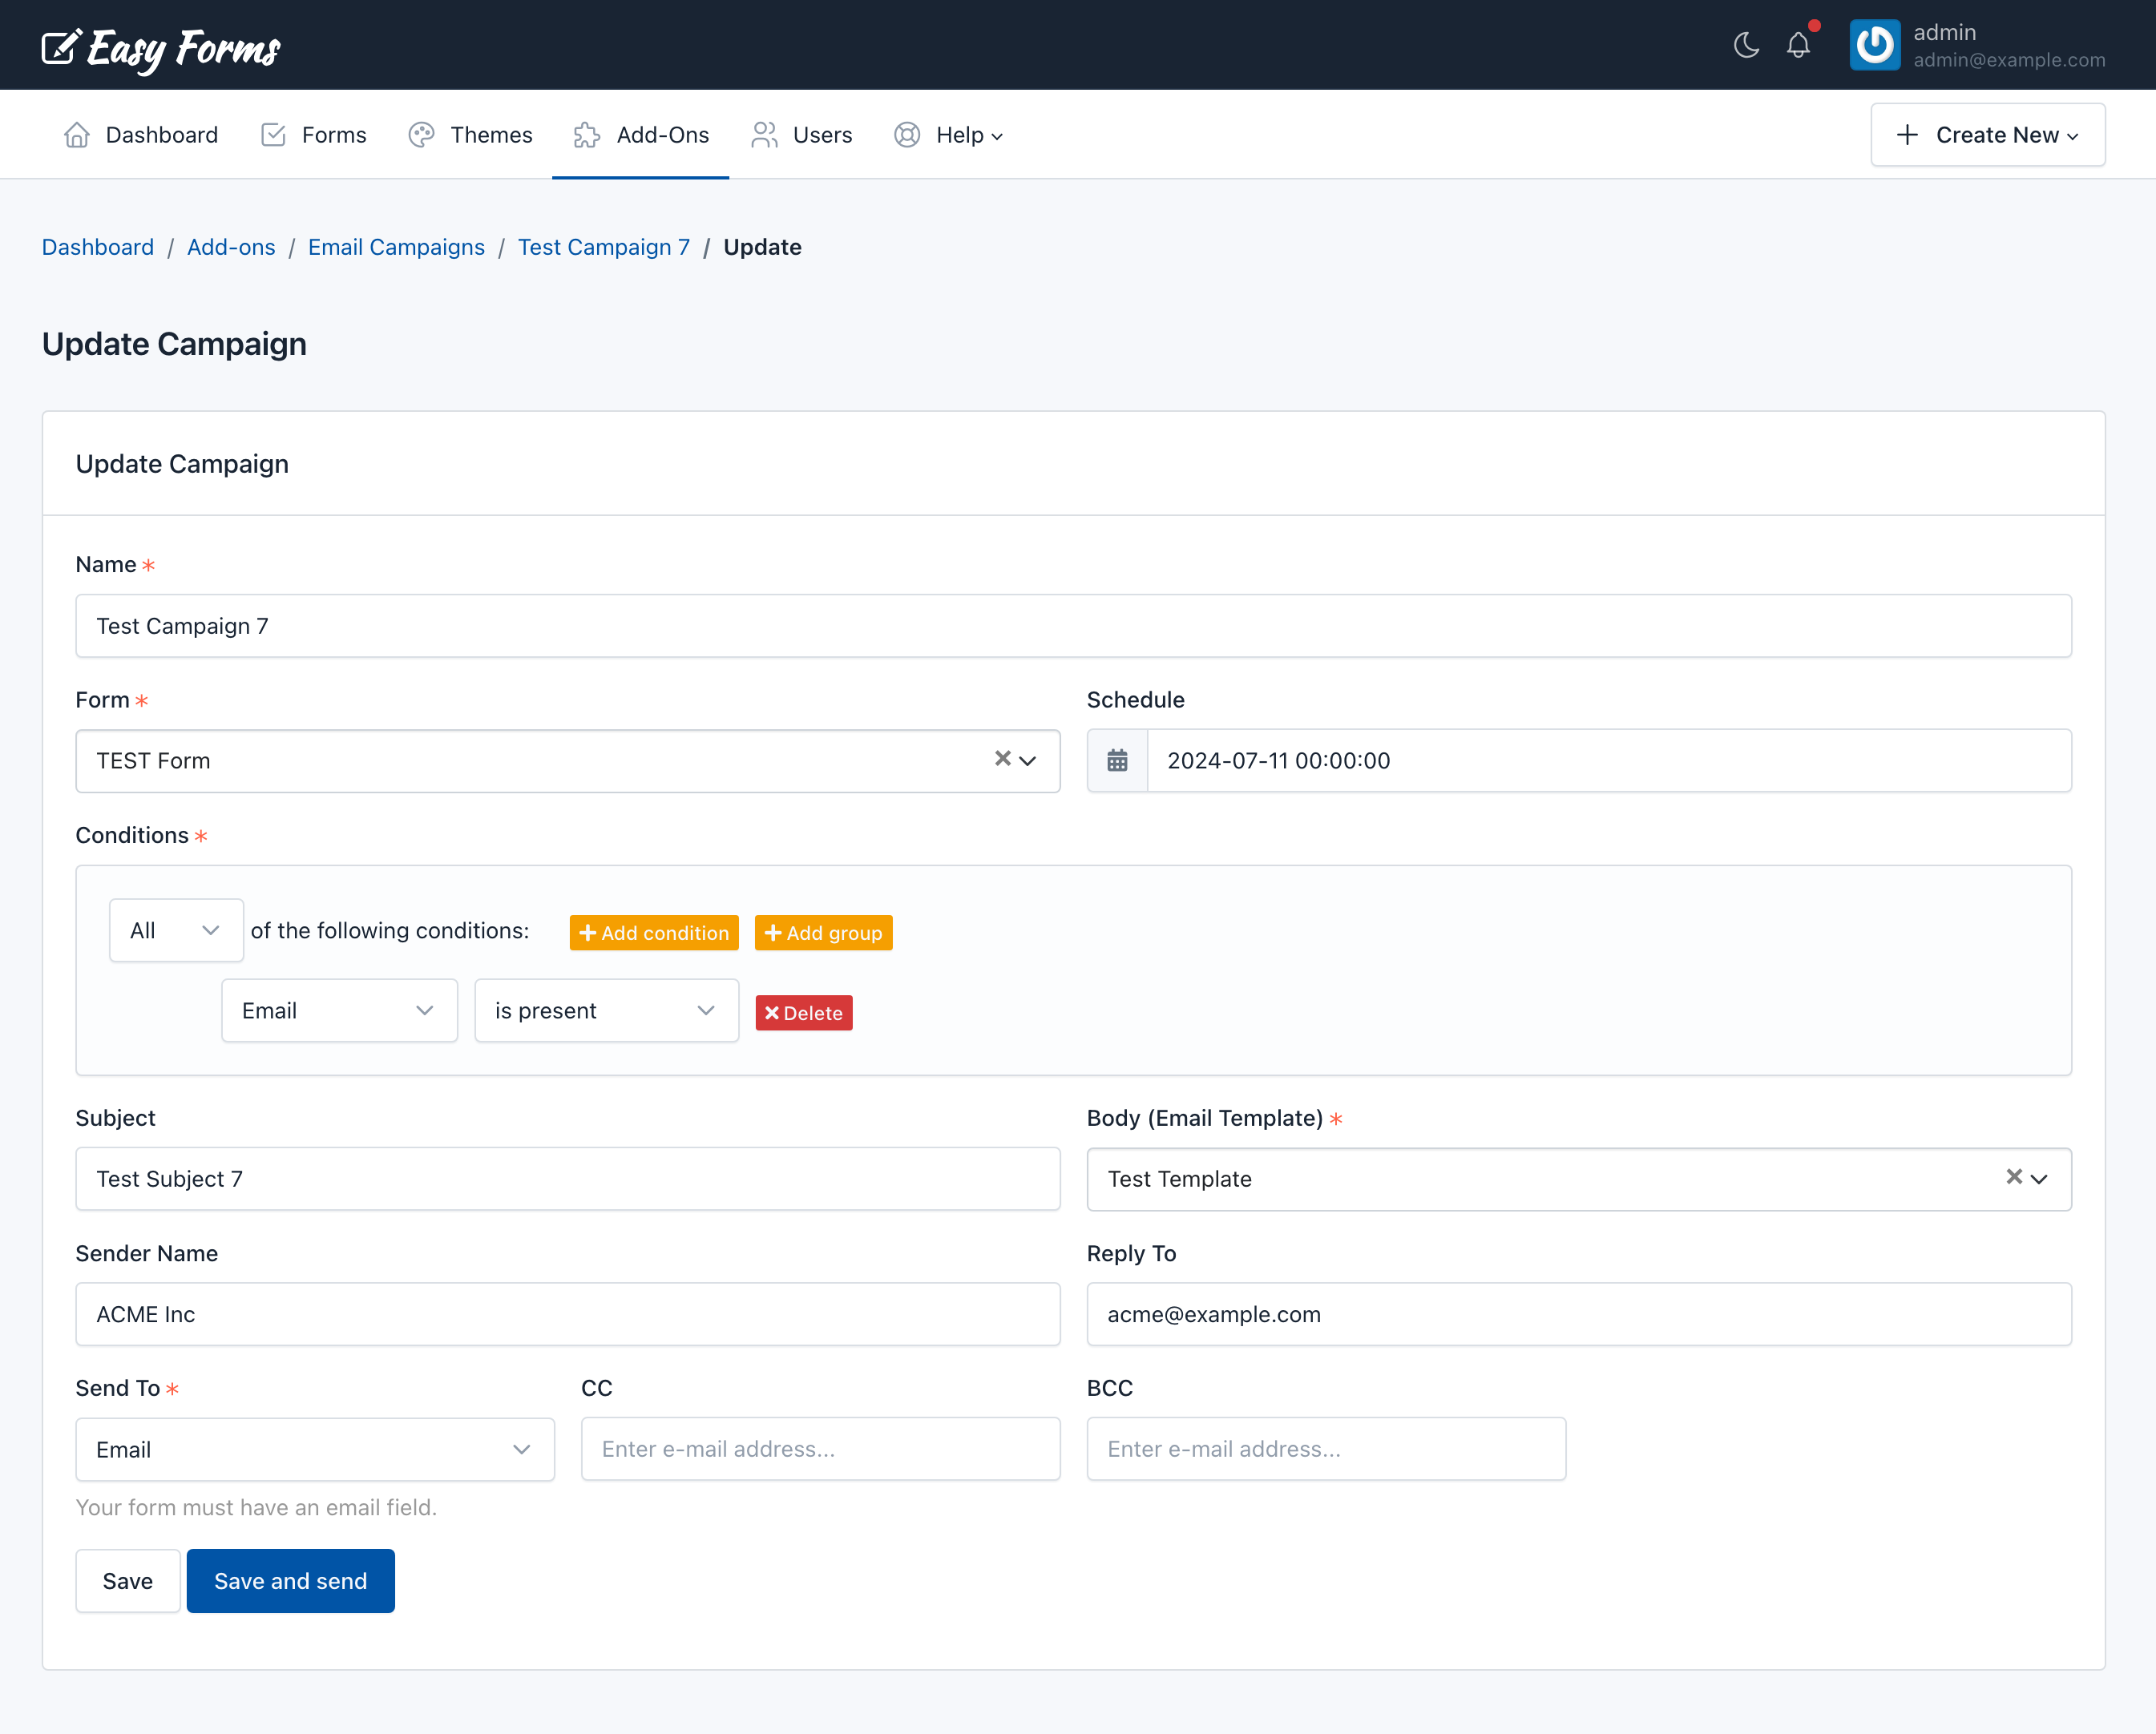
- Enter the following information:
– Name: Administrative name to identify this configuration in the system
– Form: The form from which we will extract the emails.
– Schedule: The date and time when the campaign will start
– Conditions: Sets the conditions that must be met to filter the list. For example, Email is present and Opt-In checkbox is checked and Country is United States.
– Subject: Personalize your message with merge tags
– Body (Email Template): Customize the email body with dynamic content
– Sender Name: Also know as From Name, is the display name in emails’ inboxes.
– Reply-To: The email address where a reply message is typically sent
– Send To (Email Field): The Form email field used to extract the email list.
– CC: Visible email address that will recieve a copy of the email message.
– BCC: Invisible email address that will recieve a copy of the email message. - Finally, if you are not ready to send the campaign, just click the “Save” button. When you are ready click the “Save & Send” button.
Step 5. Send an Email Campaign
After clicking the “Save & Send” button, you will be redirected to a page where you will see the list of email addresses to whom the message will be sent.
So you can take a quick look and confirm if the list is correct. At this point, you can return to the configuration form, define other conditions that allow you to filter the list according to your needs. For example, if your form has the Country field, you can create a multiple condition:
- Email field is present
- Country field is “United States”
In this way we will filter the list so that only emails are sent to users who live in the United States.
With our filtered list, we click on the “Send” button. This will cause the campaign to be marked as “Sending”.
For a campaign to be sent, two conditions need to be met:
- The campaign is marked as “Sending”
- The date and time defined in the campaign configuration has already passed
If both conditions are met, the system will begin sending requests to the Amazon SES Api to send the emails.

When all emails in the list have been processed, the campaign will be marked as “Sent” and a “Report” link will be displayed.
Step 6. Email Campagins Report
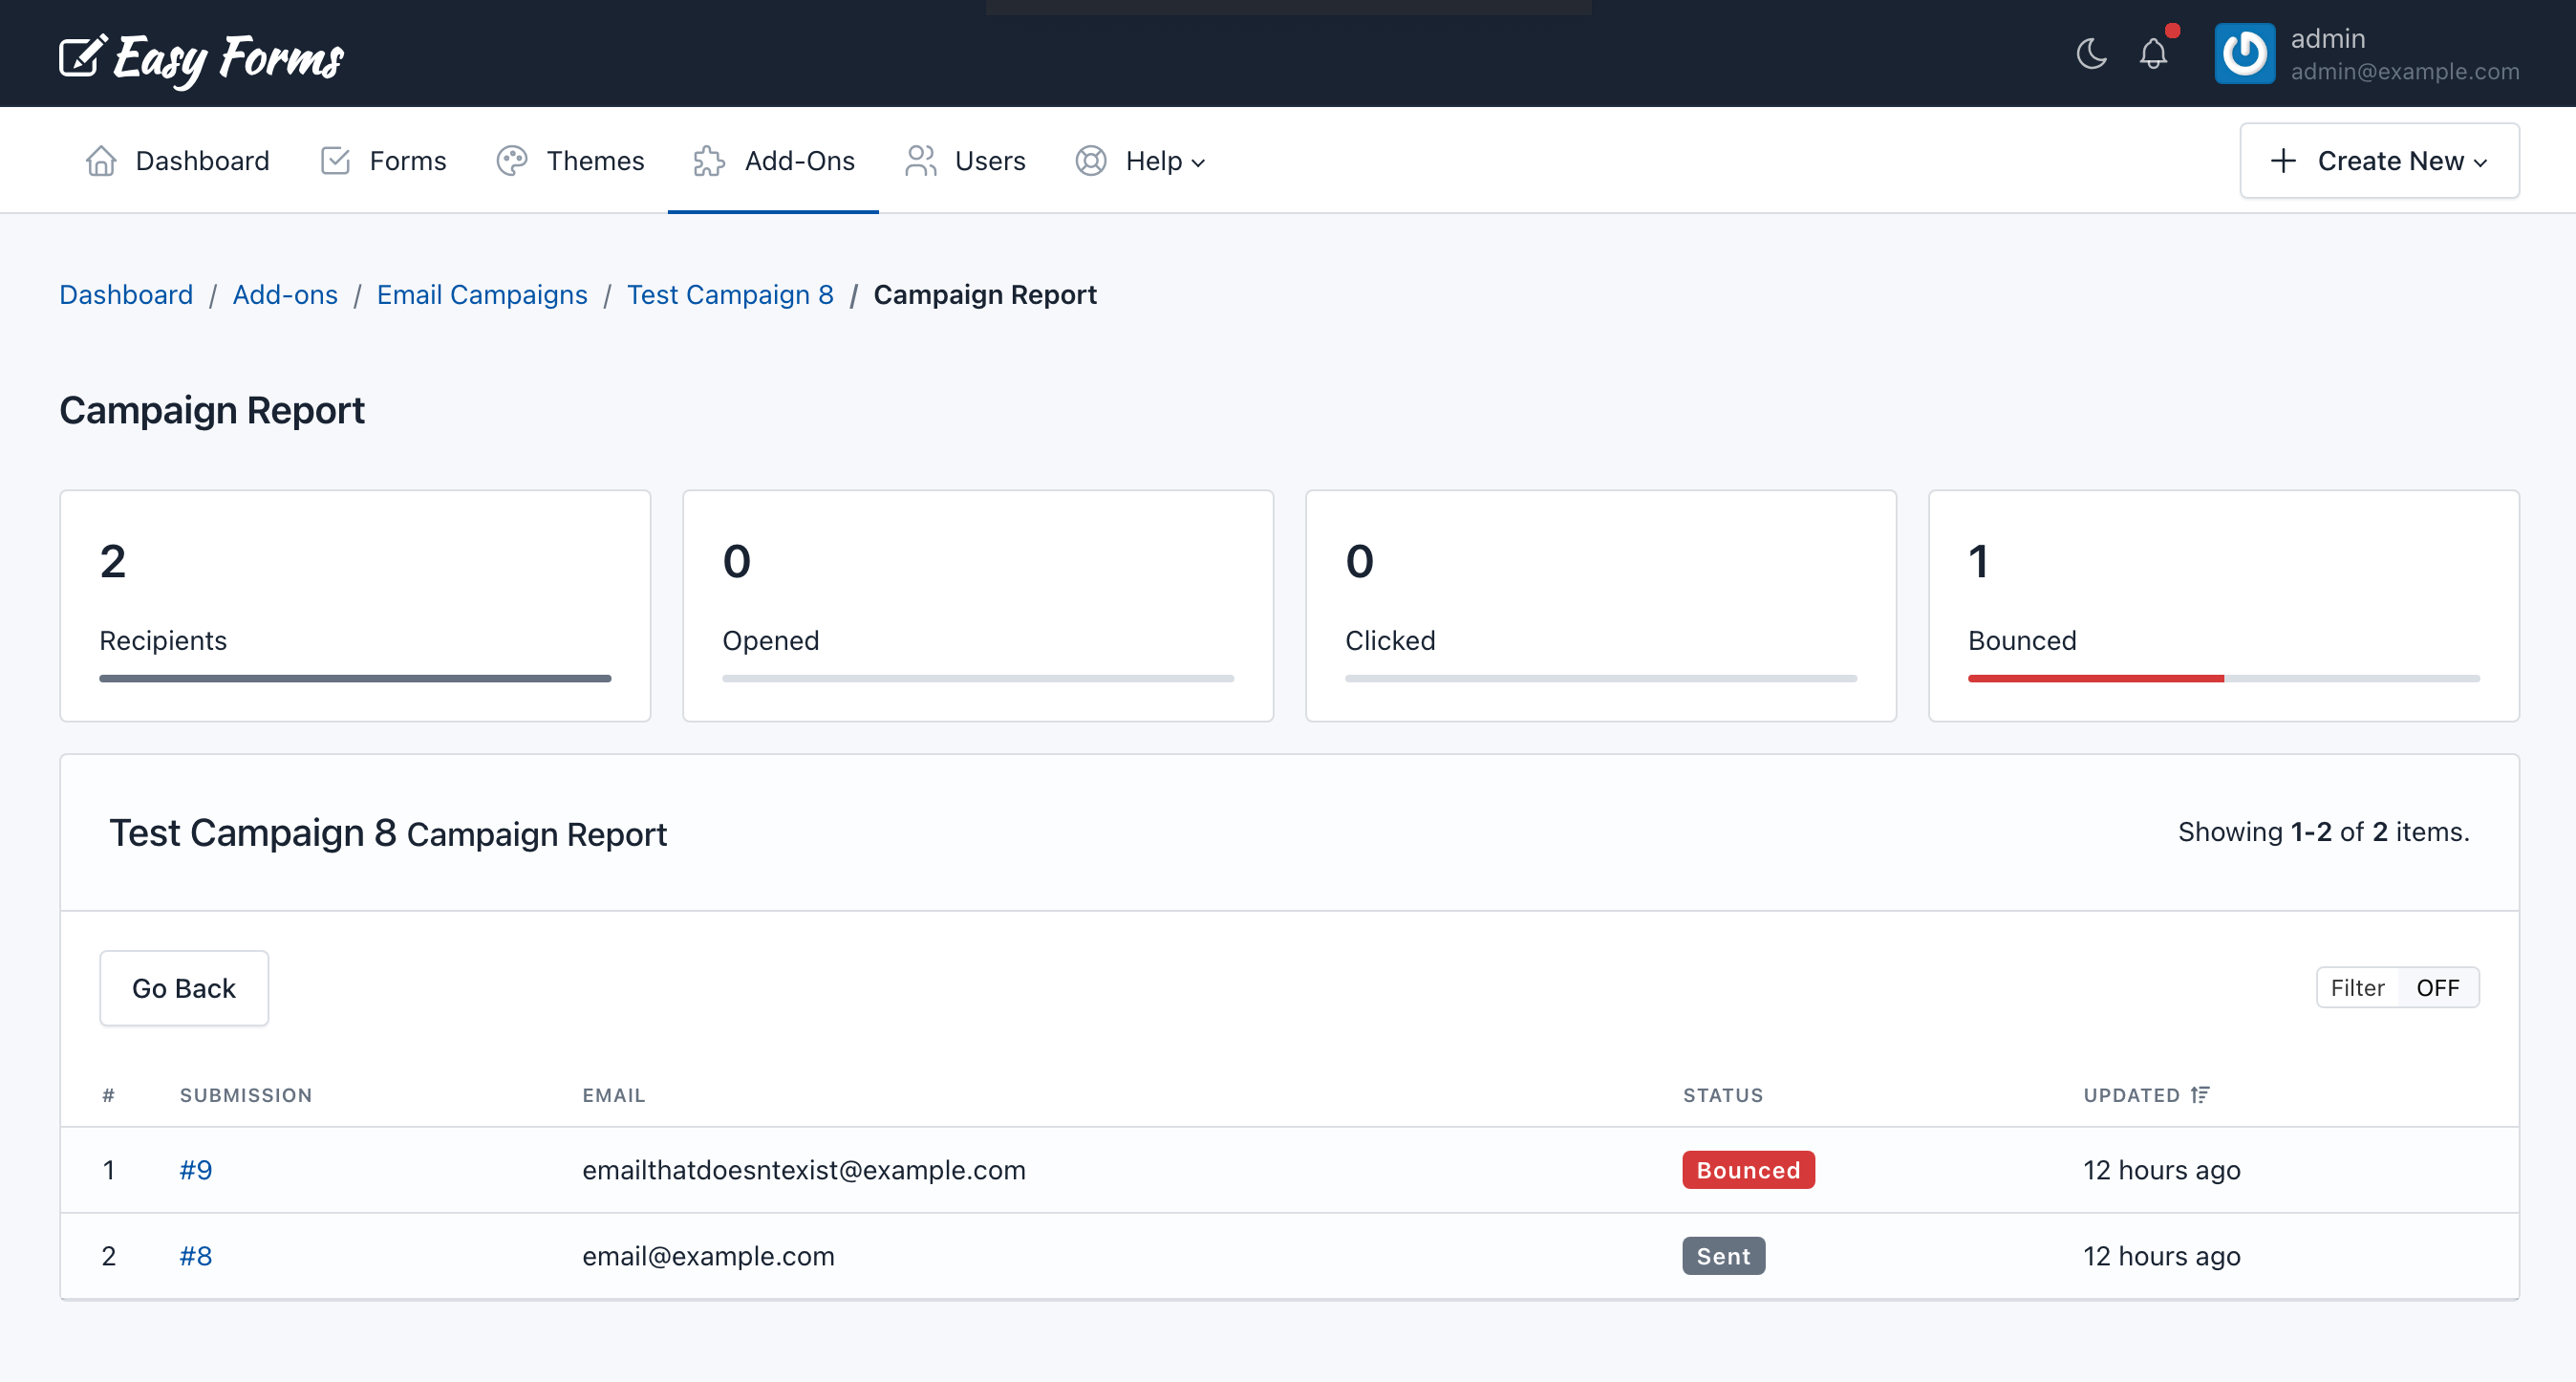
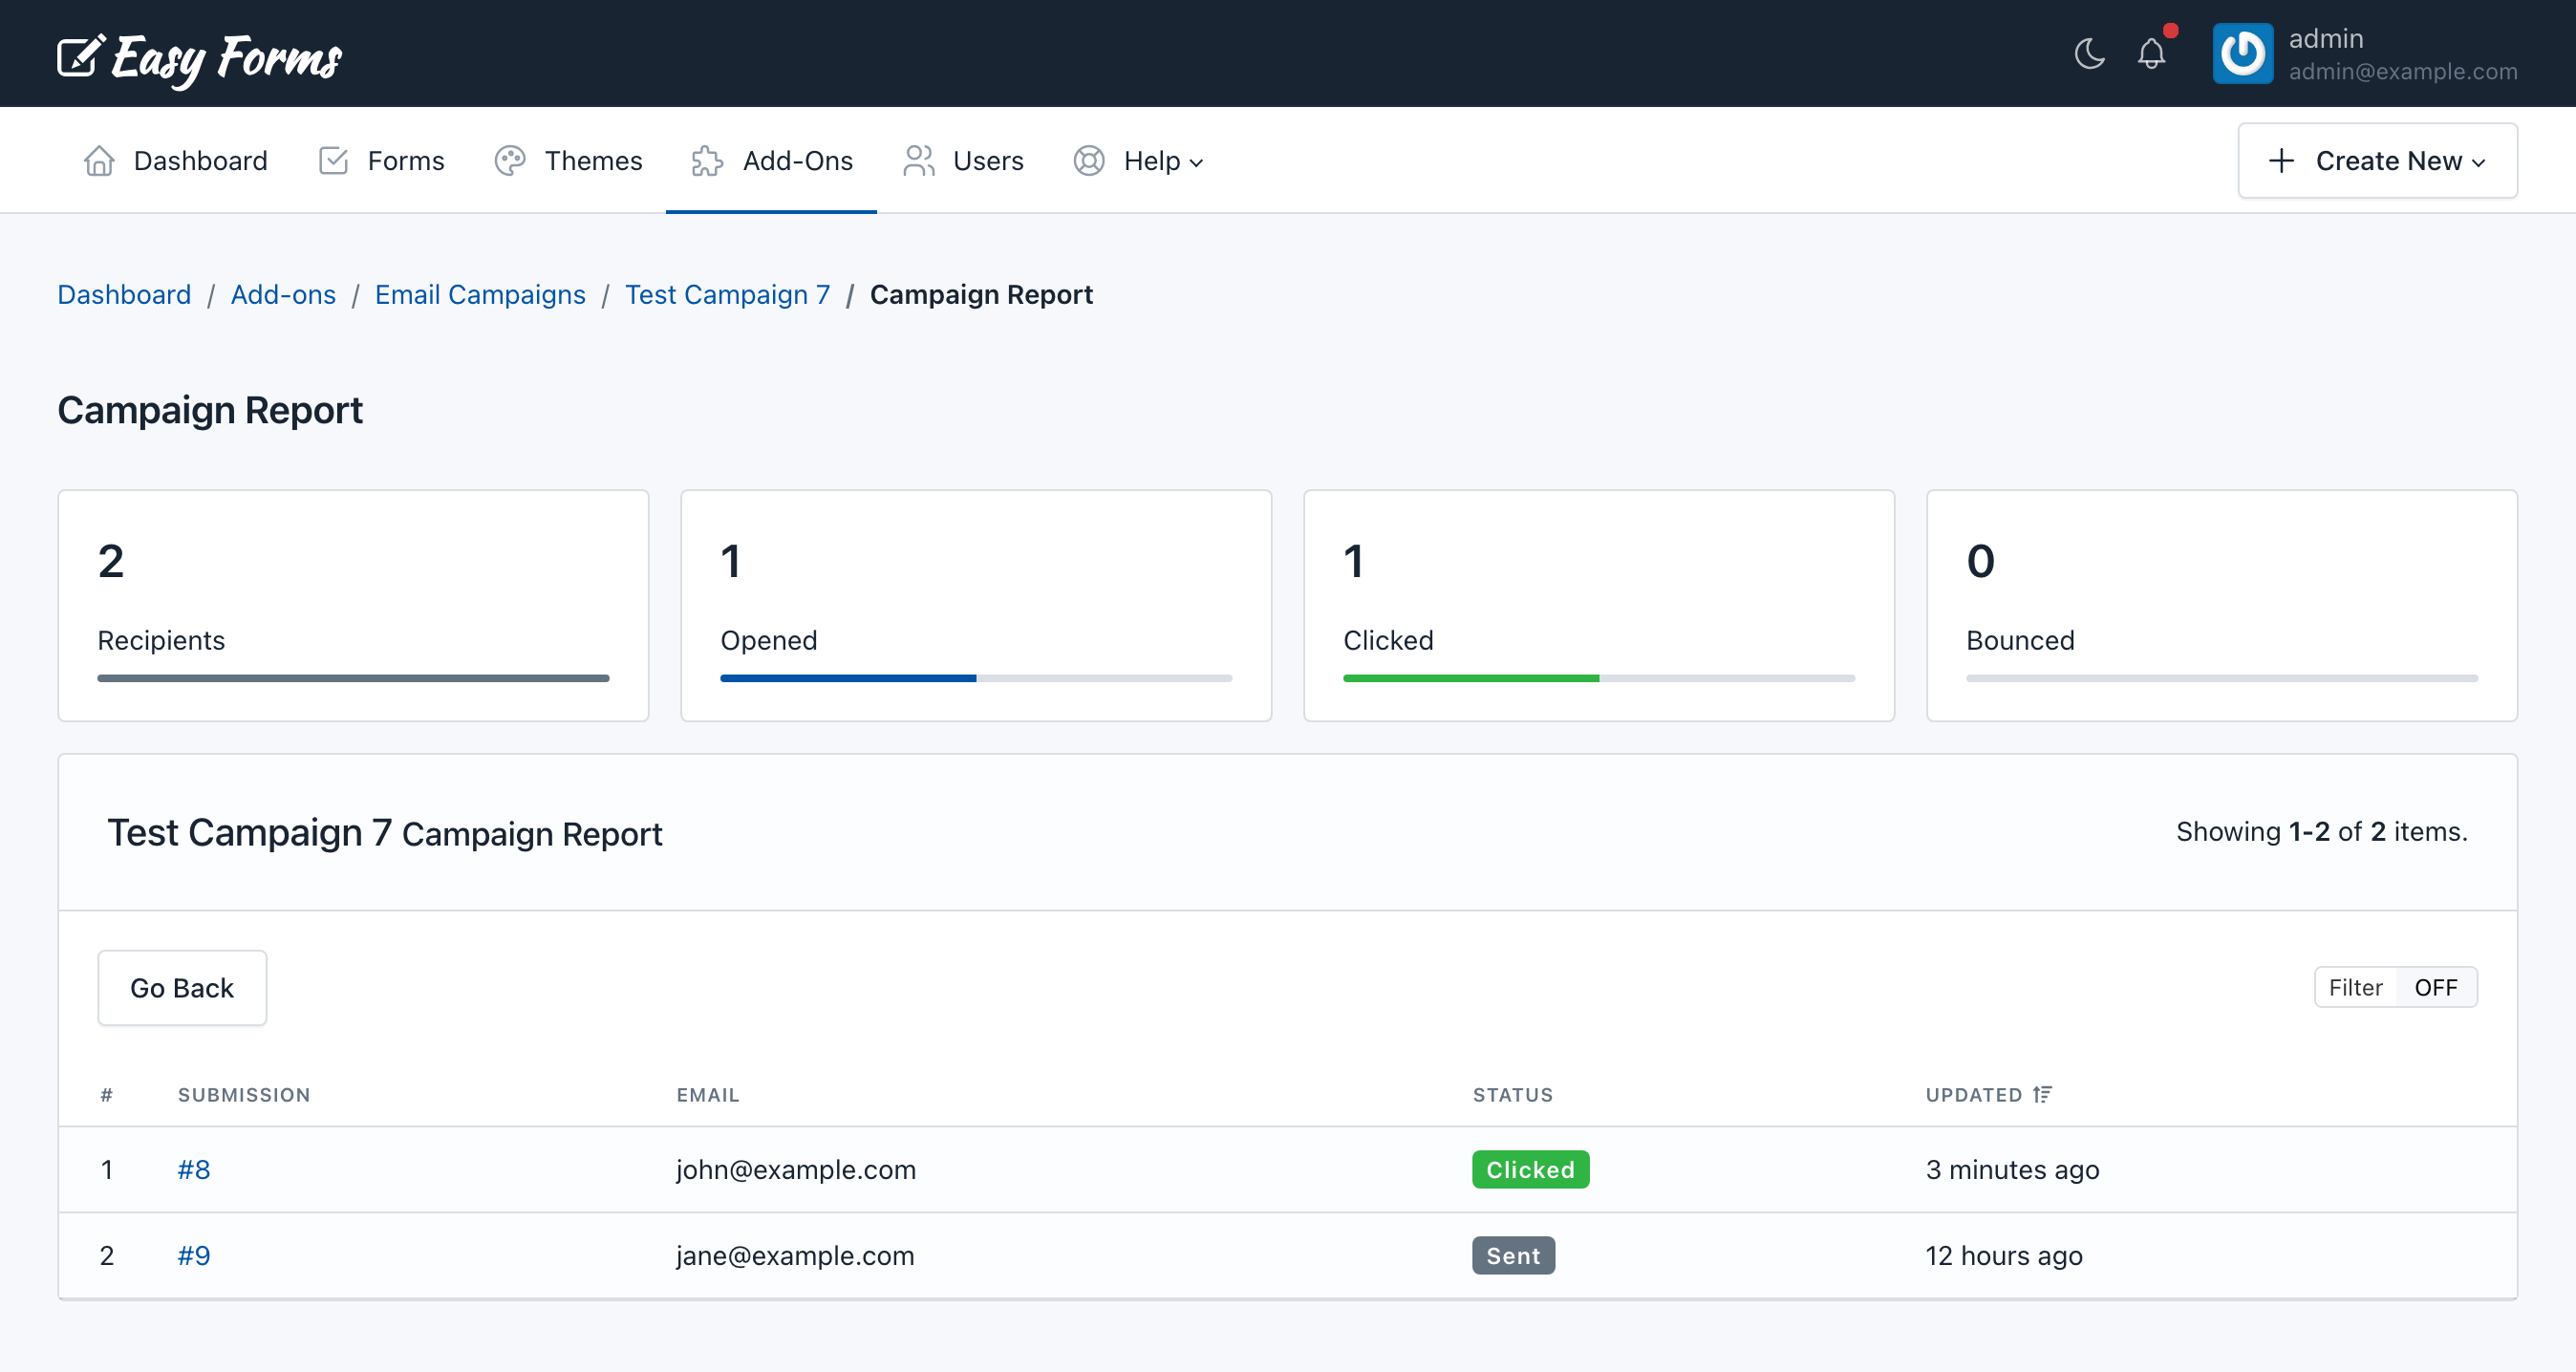
The email campaign report is very simple to understand. It shows you 4 values that will help you know how the campaign is performing:
- Recipients: The number of processed emails
- Opened: The number of processed emails that were opened by the recipients
- Clicked: The number of opened emails that were clicked by the recipients on any link of the email body
- Bounced: The number of bounced emails.
Additionally, you will be able to see the detailed list of the status of each shipment. This way, you will be able to know if any email has bounced (so you can delete that record from the system) or if a particular recipient shows interest in your email message.
From now on, you only need to repeat Step 5 to send campaigns and if you need to send a different email body, start from Step 4.
That’s all.