How do I setup a form to validate a user’s email address by having the user type in his/her address twice, then having the form compare the fields to see if the two entries match?
This can easily be done using conditional logic, which also gives you incredible flexibility not only to display an error message, but to turn other fields on or off, navigate to other pages on the form, show different thank you messages, or redirections, and much more.
We are going to start this tutorial showing you how to compare two emails and set the result of the comparison in a third field. Just to see how it works.
Build your Form
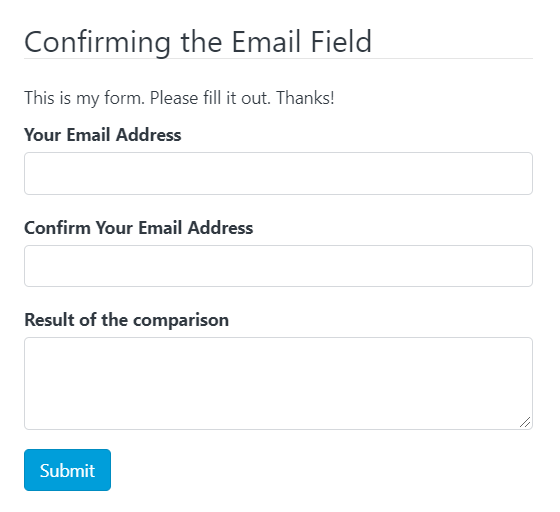
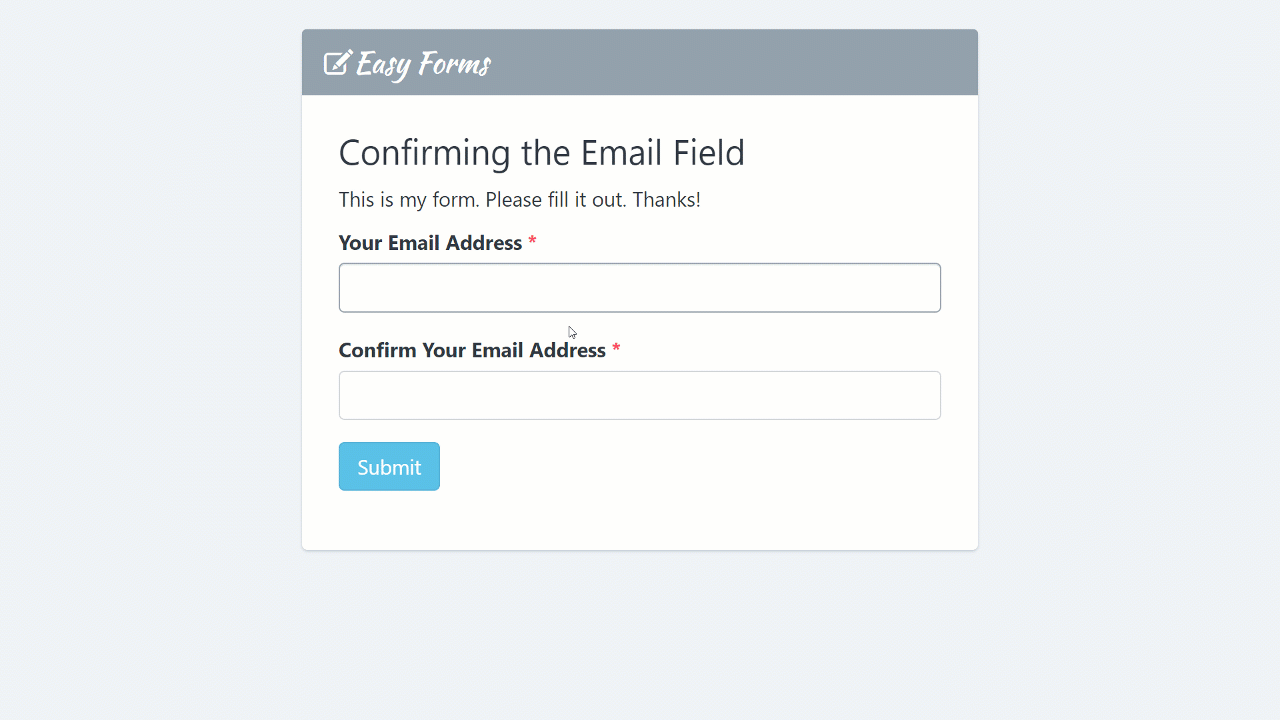
Go to the Form Builder and add 4 fields:
1. Your Email (Email Field)
2. Confirm Your Email (Email Field)
3. Result of the comparison (Text Area)
4. Submit (Button)
You should see something like this:
Set Up your Conditional Logic
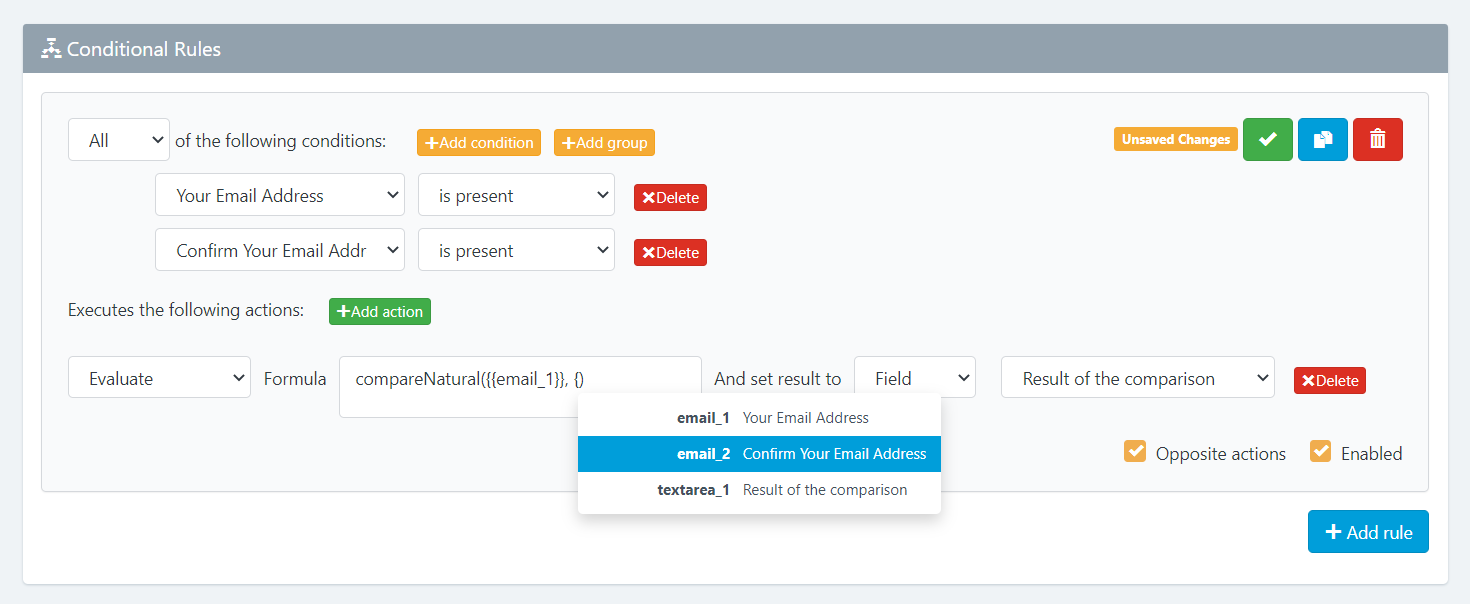
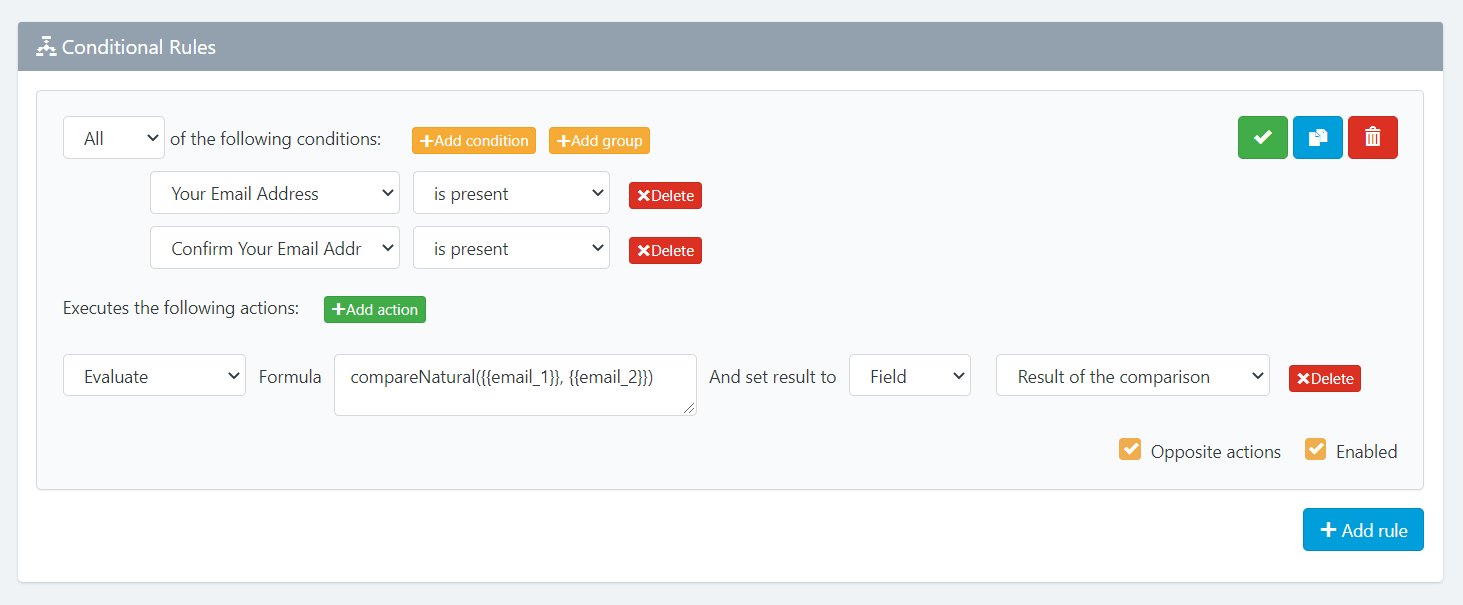
To achieve our first objective (Compare two email fields), Go to the Form’s Conditional Rules to create your first rule.
1. In Conditions, we are gong to choose “All” and add two conditions:
a. When “Your Email Address” is present
b. When “Confirm Email Address” is present
2. In Actions, we are going to evaluate a formula to compare texts in a natural way, by using the compareNatural(val1, val2) function. This function receives two values, in this case the fields to compare.
a. Select Evaluate
b. In Formula enter compareNatura()
c. Between “()”, click “{“ to display the auto-suggest tool and choose the first email field
d. Add a comma to separate both values, and click “{“ to display the Suggestions tool again to choose the second email field.
e. Finally, set the result to the text area field.
The Auto-Suggest tool looks like this:
Now we are going to see this configuration in action.
See your Form in Action
Go to Forms -> Actions -> Publish & Share -> Share Form Link -> Go
When you start filling the second email field, the Result field will show a number.
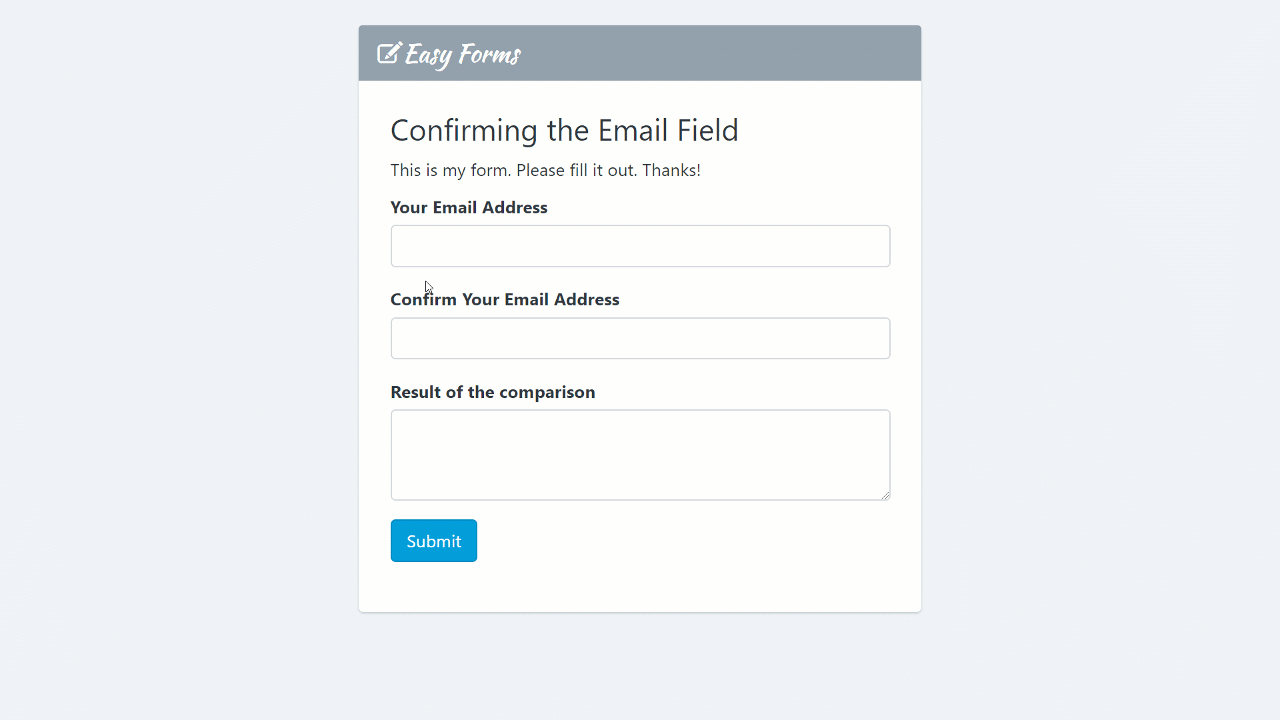
The result: 1 when First Field is bigger than the Second Field, -1 when First Field is lower than Second Field, and 0 when both fields are equal.
Ok, we have finished the explanation of this advanced feature. Now, we are going to configure some actions according to the result.
Use a Hidden Field to store the result
As the result of the comparison is not friendly for our end users, we can use it only for technical purpose. So, we are going to remove the Text Area, and add a Hidden Field with the same label.
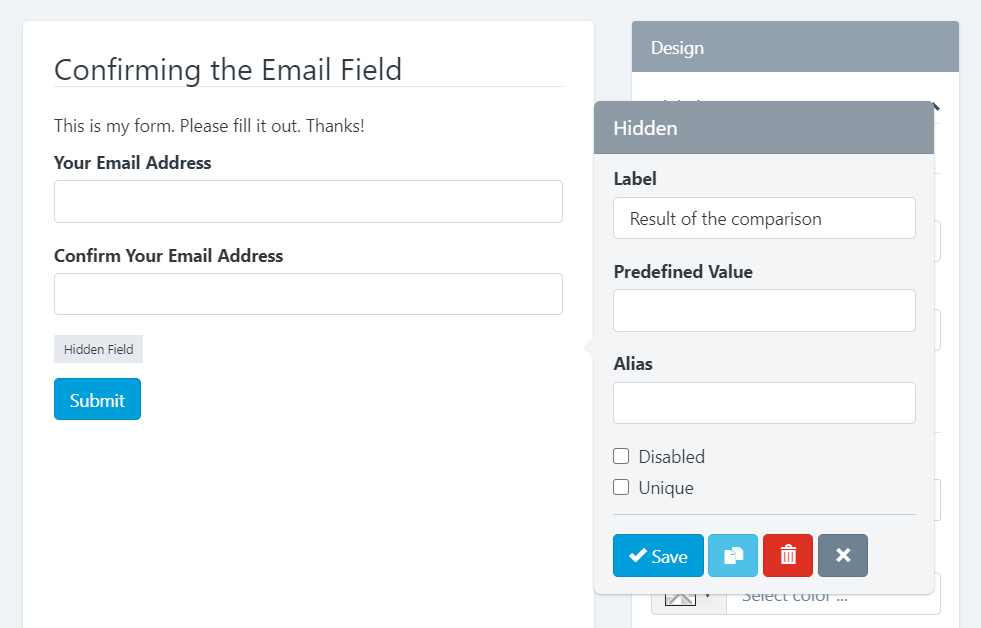
As we have removed the text area field, our conditional rule will show an empty field.

We need to select the added hidden field (Label: Result of the comparison) and Save.
Enable / Disable the Submit Button
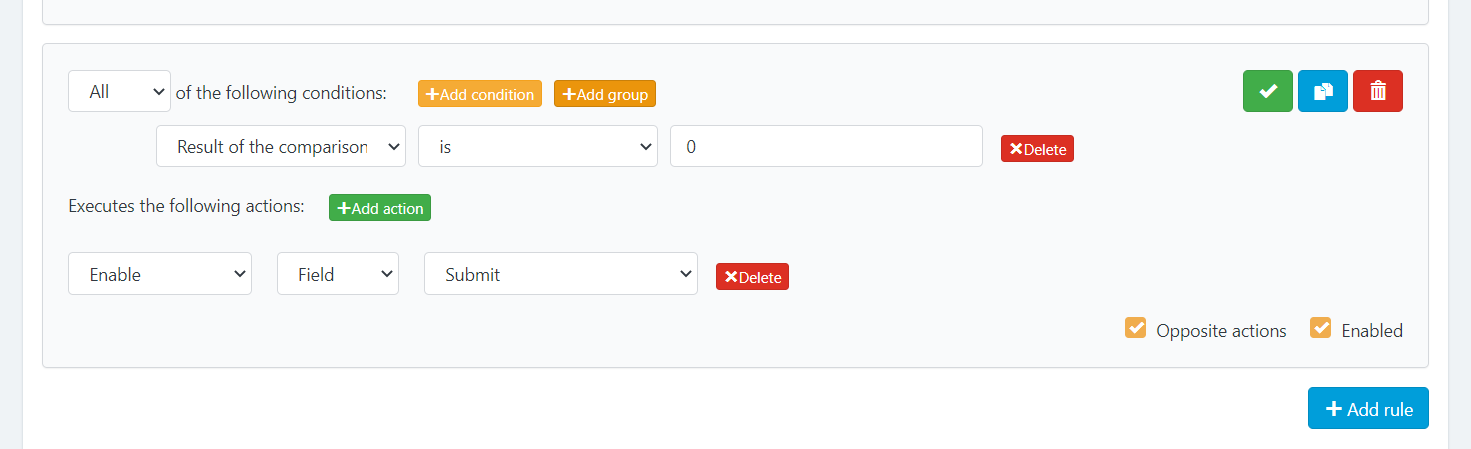
To achieve our second objective (Submit only if they are the same) we are going to add a new conditional rule. This rule must be placed below the comparison rule (Remember, order is important in conditional logic).
So, click Add rule and add the following condition and action:
- When “Result of comparison” is 0
- Then Enable Field “Submit”
That’s it.
Now your form should have this behavior.

Show an alert message
Now we are going to display an alert message to indicate our users if they have entered their email correctly.
Go to the Form Builder and follow these steps:
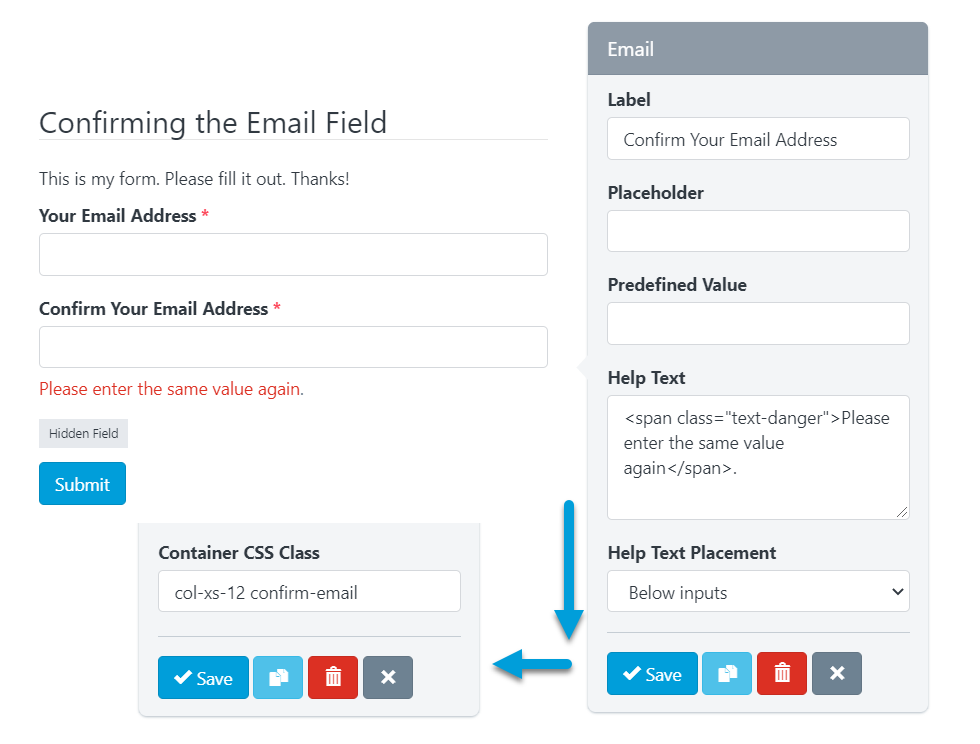
- Mark both email fields as required.
- In “Confirm Your Email Address” add a Container CSS Class: confirm-email and enter the following Help Text:
<span class=”text-danger”>Please enter the same value again</span> - Save your form
Finally, go to Conditional Rules and add a new rule:
When “Your Email Address” is present (has a value)
And “Result of comparison” is not 0
Then Show the Element .confirm-email p
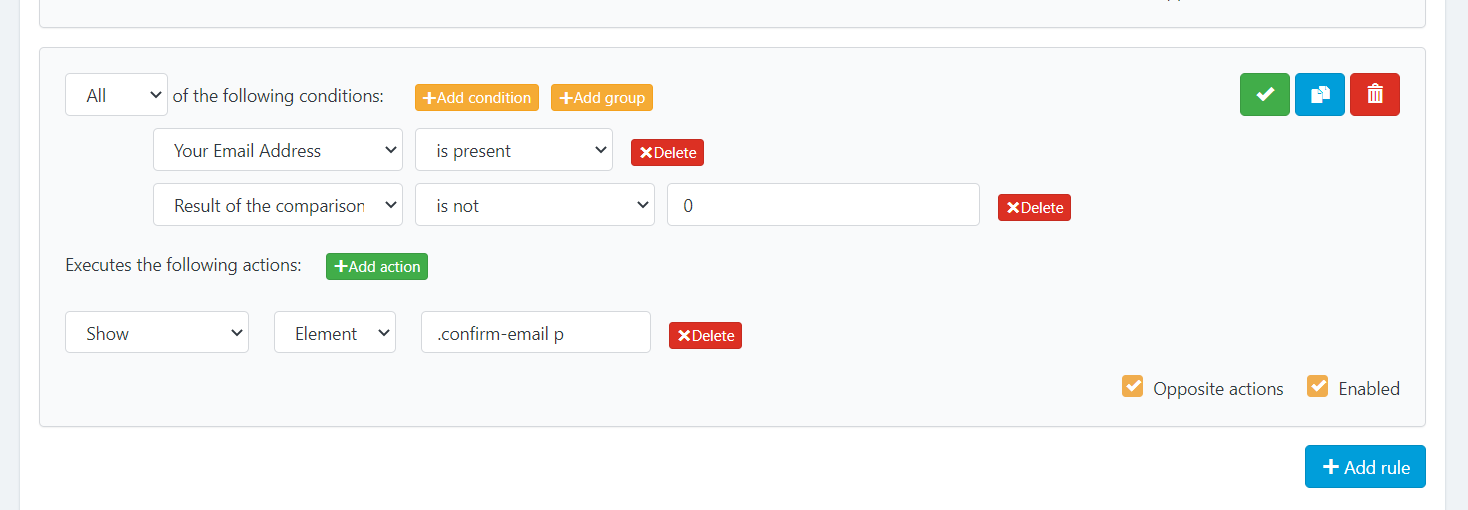
Note: An Element should be a jQuery selector. In this case, the element is the paragraph inside the HTML element with the CSS Class confirm-email.
Now your form should have this behavior.
Pay attention as the alert message is only shown when the user has filled in the first field, but disappears when the second field matches the first one. And the behavior of the button remains.